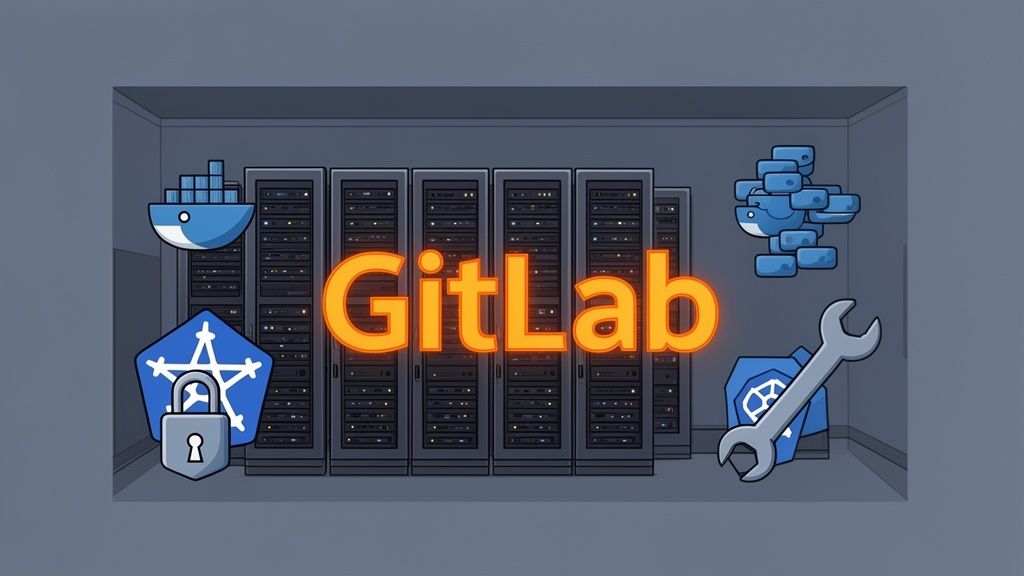
While GitLab's cloud service is certainly convenient, taking the reins with GitLab self-hosting gives you absolute control over your entire DevOps environment. For any business that puts a premium on data sovereignty, security, and performance, this is a game-changer. It means your intellectual property stays exactly where it should: within your own infrastructure.
Why Self-Host GitLab for Your Business
 Choosing to run your own GitLab instance is far more than a technical tick-box exercise; it's a strategic decision that tightly aligns your DevOps platform with your core business goals. Full ownership brings real, tangible benefits that you can see in your security, performance, and day-to-day operational freedom. For companies in heavily regulated industries, this isn't just a nice-to-have—it's often a strict requirement.
Imagine a fintech firm in Germany grappling with the tight constraints of GDPR. The idea of storing sensitive financial data and proprietary algorithms on third-party servers, no matter how reputable, is a compliance nightmare waiting to happen. By self-hosting, they guarantee all that critical information stays within their chosen geographical borders, making audits simpler and strengthening customer trust.
Gaining Complete Control and Sovereignty
The biggest draw for self-hosting is the sheer level of control it puts in your hands. You call the shots on everything, from the server hardware right down to the network configuration. This command is vital for a few key reasons:
- Data Sovereignty: You decide precisely where your data resides, making it much easier to comply with regional data protection laws like GDPR or CCPA.
- Customisation Freedom: Feel free to modify your instance, integrate it with unique in-house tools, and apply custom configurations without bumping into vendor limitations.
- Security Hardening: You can implement your own specific security protocols, firewall rules, and access controls, moulding the instance to fit your organisation's security posture like a glove.
This autonomy also liberates you from vendor lock-in. You're in charge of the upgrade cycle, rolling out updates on your own timeline after proper testing, instead of being pushed into a vendor's schedule that might clash with your development sprints. If you're considering this level of control for other tools, our article on a practical guide to self hosting Jira offers similar insights.
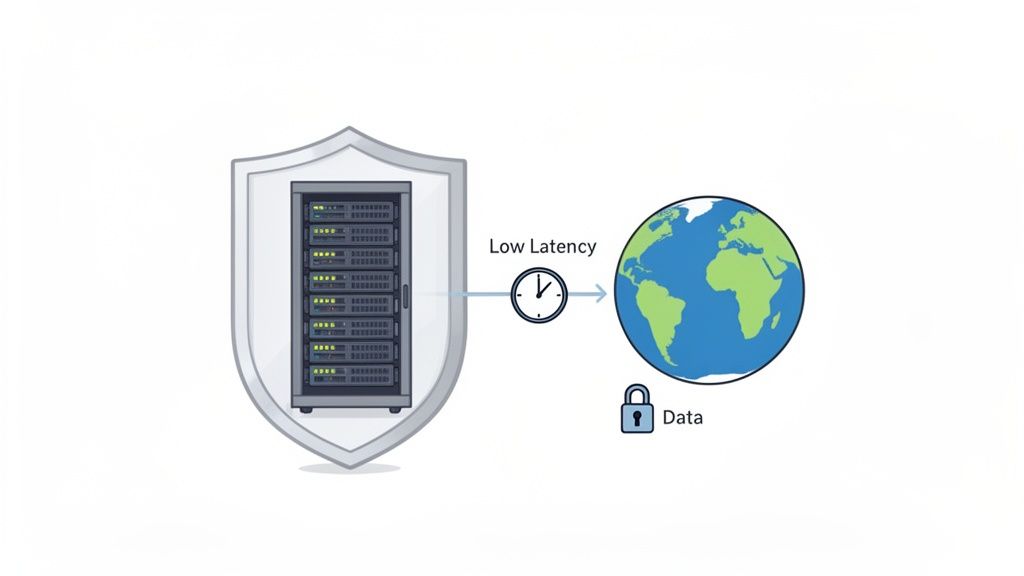
Boosting Performance for Global Teams
Performance is another massive win, particularly if your teams are spread across the globe. When developers are working from different continents, latency can become a serious drag on productivity. Cloning large repositories or waiting for CI/CD pipelines to run can be painfully slow when the main server is an ocean away.
With a self-hosted instance, you can strategically place your GitLab server in a location that cuts down latency for the bulk of your team. This has become especially relevant in the DE region, where local hosting providers have seen a spike in deployments driven by GDPR concerns. For instance, hosting providers with GitLab servers in Germany can slash latency for EU-based teams, reportedly boosting productivity by up to 30% in distributed setups.
Choosing to self-host GitLab is a commitment to owning your entire software development lifecycle. It’s about building a fortress around your intellectual property while fine-tuning the environment for maximum developer efficiency.
Laying the Groundwork for Your GitLab Instance
Before you even think about running an installation script, let’s talk about what makes or breaks a self-hosted GitLab setup: solid planning. Getting this right from the start is the difference between a smooth-running DevOps hub and a constant source of performance headaches. This is your pre-flight check for sizing your infrastructure and sorting out the network details.
The first, and most important, question to answer is: how many people will actually be using this thing? Think about your active developers, the ones pushing code, firing off CI/CD pipelines, and creating merge requests all at the same time. That number is your single most critical metric.
Getting Your Server Sizing Right
Figuring out your resource needs feels a bit like a dark art, but you can get close with some smart estimation. Forget generic advice for a moment. A team building small web apps has completely different demands than a group working on a massive C++ monolith with incredibly resource-hungry build jobs.
Your CI/CD runners, in particular, will be the biggest resource hogs, so don’t underestimate their impact. Start by mapping your active user count to CPU, RAM, and storage, and then add a buffer based on your specific workflows.
Here's a quick reference table to get you started on sizing your server or virtual machine. Think of these as sensible starting points, not rigid rules.
Recommended System Resources by User Count
| User Count | Recommended vCPU | Recommended RAM | Estimated Storage (1 Year) | | :--- | :--- | :--- | :--- | | Up to 25 | 4 Cores | 8 GB | 100 GB | | Up to 100 | 8 Cores | 16 GB | 500 GB | | Up to 500 | 16 Cores | 32 GB | 2 TB | | 1000+ | 32+ Cores | 64+ GB | 5 TB+ (Consider HA) |
Remember, these figures are a baseline. If your teams rely heavily on advanced features like security scanning, built-in package registries, or Git LFS for large assets, be more generous with your provisioning. It’s always far less painful to scale up a VM than it is to troubleshoot a system that’s constantly gasping for air.
Nailing Down Your Network Configuration
Once you have a handle on the hardware, it's time to think about the network. These decisions are foundational and a real pain to change later, especially once your instance is live and full of precious data.
First off, your GitLab instance needs its own dedicated, easy-to-remember domain name. This isn't just about looking professional; it's crucial for configuring SSL/TLS certificates and setting up integrations with other tools.
Here are the networking essentials to lock down:
- A Dedicated Domain: Pick a clean, obvious subdomain. Something like
gitlab.yourcompany.deworks perfectly and gives you a stable endpoint for everyone and everything to connect to. - SSL/TLS Certificates: Running on unencrypted HTTP is simply not an option. You must secure your instance with HTTPS. Plan on using a trusted certificate authority—Let's Encrypt is a fantastic, automatable option, but your organisation might require a commercial provider.
- Firewall Rules: Your firewall is the gatekeeper. At the absolute minimum, you need to open port 443 for HTTPS web traffic and port 22 if your team uses SSH for Git operations. Be strict and lock everything else down unless you have a specific, documented reason to open another port.
A well-thought-out network setup is what makes your GitLab instance accessible, performant, and secure. Don't treat it as an afterthought; it's just as critical as the server it runs on.
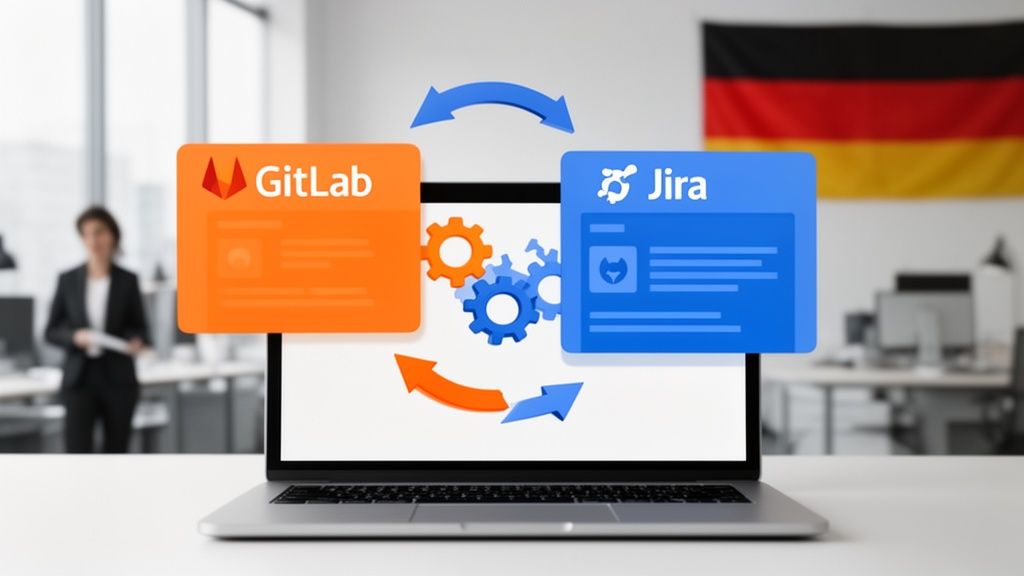
Thinking through these details now saves you a world of trouble during the actual installation. Plus, when you're ready to hook GitLab into other key systems, this solid foundation makes everything easier. For example, if you plan on linking to issue trackers, our practical guide to GitLab and Jira integration can show you how a properly configured instance simplifies the process. By taking the time to plan your infrastructure and network, you’re setting yourself up for a truly powerful and reliable self-hosted GitLab experience.
Choosing the Right Installation Method
Picking the right way to install your self-hosted GitLab instance is one of the biggest decisions you'll make right out of the gate. It has a direct impact on everything from day-to-day operations and future upgrades to how you’ll scale when your team grows. There's no single "best" answer; the right choice is all about your team's current skills, your infrastructure, and where you see your needs heading.
We're going to walk through the three main approaches—Omnibus, Docker, and Kubernetes—to give you a clear, real-world picture of what each one is like to live with. This isn't just about comparing features; it's about helping you match the technology to your operational reality.
This decision tree helps visualise some of the key questions that can point you toward the best fit.
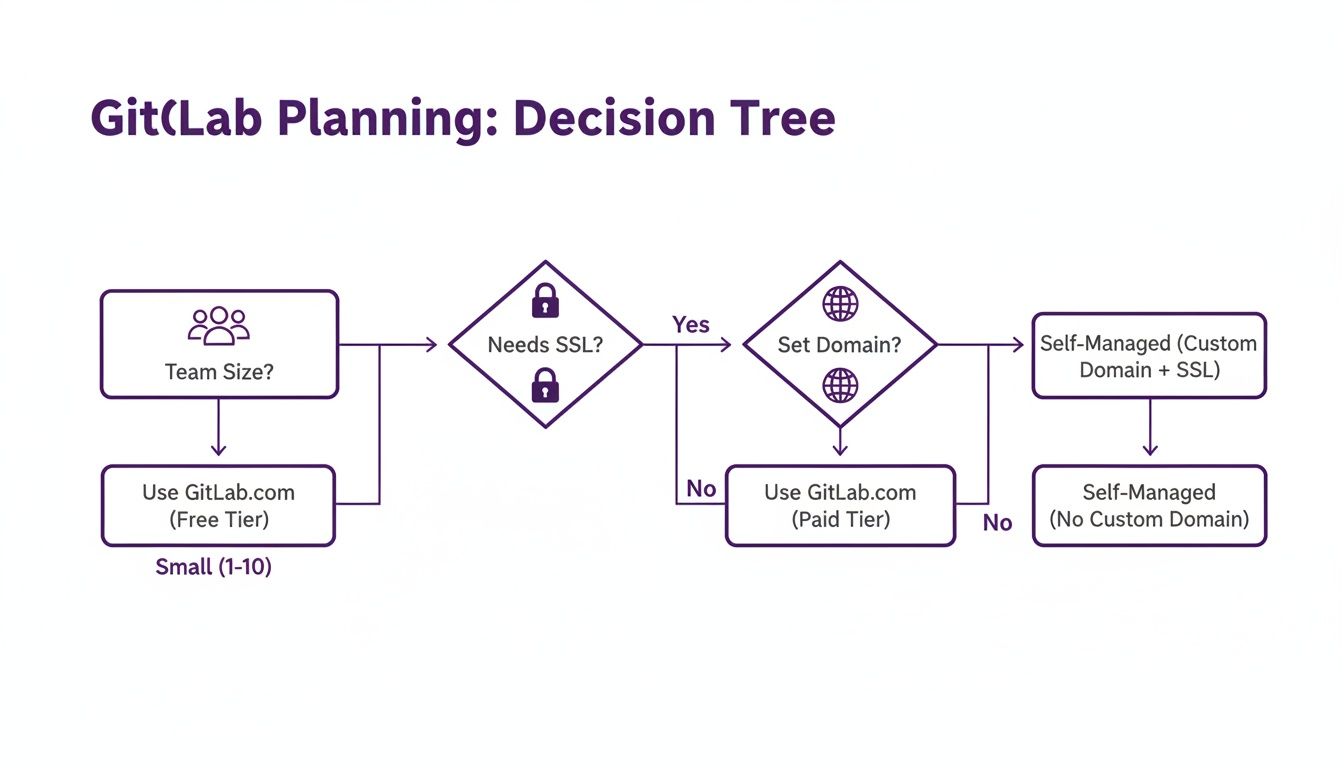
The image really highlights a key point: as your need for fine-grained control and customisation grows, a self-managed solution quickly becomes the most sensible path forward.
The Omnibus Package: The All-In-One Powerhouse
For most people diving into GitLab self-hosting for the first time, the Omnibus package is the most direct and recommended route. Honestly, it's the "GitLab in a box" solution. It neatly bundles all the services you need—NGINX, PostgreSQL, Redis, and GitLab itself—into one package, all managed from a single configuration file.
This approach makes the initial setup astonishingly simple. You don't have to be a database guru or a reverse-proxy wizard to get a production-ready instance online. Upgrades are also a breeze, usually just a couple of commands to get the new version running.
But, that simplicity does come with a trade-off. Because everything is so tightly integrated, you lose some granular control. If you absolutely must use an external PostgreSQL database or want to integrate with an existing web server, the Omnibus package can start to feel a bit rigid.
The Omnibus package is optimised for speed and simplicity on a single server. It's the perfect starting point for small-to-medium teams who want an officially supported, reliable installation without a massive learning curve.
Docker and Docker Compose: For Flexibility and Isolation
If the all-in-one Omnibus approach feels too restrictive, deploying GitLab with Docker is a fantastic middle ground. This method puts the various GitLab services into their own containers, giving you great process isolation and making dependency management a non-issue. No more worrying about library conflicts on your host OS.
With Docker Compose, you can define your entire GitLab setup in one docker-compose.yml file, which makes spinning your environment up, tearing it down, or even replicating it somewhere else incredibly straightforward. It’s a perfect fit for teams already comfortable with container-based workflows.
You get a lot more flexibility this way. For instance, swapping out the bundled PostgreSQL container to point to an external, managed database service is pretty simple. This separation of components is a huge plus for more advanced setups. The main thing to remember is that you're taking on the responsibility of managing a containerised environment—you'll need a decent grasp of Docker networking and volumes for persistent data.
Kubernetes with Helm: For Ultimate Scalability and Resilience
For large organisations where GitLab is truly a mission-critical service, deploying on Kubernetes using the official Helm chart is the gold standard. This is where you unlock the full power of a cloud-native setup, getting you unparalleled scalability, high availability, and self-healing capabilities.
On Kubernetes, GitLab is broken down into microservices (in Pods) that you can scale independently. If your CI/CD runners are getting hammered, you can scale just those workers without touching the web server or Gitaly.
The benefits are hard to ignore:
- High Availability: Kubernetes automatically restarts failed containers and moves them to healthy nodes, which massively reduces downtime.
- Dynamic Scaling: You can set up Horizontal Pod Autoscalers to add or remove resources automatically based on CPU or memory usage.
- Infrastructure as Code: The Helm chart lets you manage your entire GitLab deployment declaratively. Your whole setup is defined in code, making it repeatable and easy to version control.
Of course, this power comes at a price. Running and maintaining Kubernetes is a serious operational commitment. It demands specialised expertise in container orchestration, cluster networking, and storage. It is by far the most complex of the three methods and should really only be on the table for teams that already have a mature Kubernetes platform and the in-house skills to manage it.
Installation Method Comparison: Omnibus vs. Docker vs. Kubernetes
To help you decide which approach best suits your team's technical expertise and operational needs, here's a quick comparison of the key characteristics of each GitLab installation method.
| Attribute | Omnibus Package | Docker Compose | Kubernetes (Helm) | | ------------------------- | ---------------------------------------- | ---------------------------------------------- | ------------------------------------------------ | | Ease of Setup | Easiest | Moderate | Most Complex | | Flexibility | Limited | High | Highest | | Scalability | Vertical (Single Server) | Vertical/Limited Horizontal | Horizontal (Cluster-wide) | | Best For | Small to medium teams, single-server setups | Teams comfortable with containers, needing flexibility | Large enterprises, mission-critical deployments |
Ultimately, choosing your installation method is about matching the tool to the job. Start with what your team knows and what your infrastructure can support, but always keep an eye on where you want to be in a year or two.
How to Secure and Maintain Your Instance
 Getting your GitLab instance up and running is a great feeling, but that’s really just the starting line. The real work in GitLab self-hosting is the ongoing care and feeding needed to keep your platform secure, reliable, and performing at its best. This isn't a "set it and forget it" system; think of it as a living part of your core infrastructure that demands consistent attention.
This operational diligence is what turns a powerful DevOps tool into a strategic asset, rather than a potential security weak point. From hardening your configuration to having a rock-solid disaster recovery plan, these practices are non-negotiable for any serious deployment.
Starting With a Security Hardening Checklist
Your first job after installation is to lock the place down. A default install is functional, but it's not hardened for a production environment. I always think of a new GitLab instance like a fortress; you need to secure every gate, wall, and access point right away.
The best way to tackle this is with a simple, practical checklist. Here are the absolute essentials you should put in place immediately:
- Enforce Two-Factor Authentication (2FA): Honestly, this is the single most effective thing you can do to stop unauthorised access. Make it mandatory for every user, especially your admins. No exceptions.
- Configure Rate Limiting: Protect your instance from brute-force password guessing by limiting login attempts from any single IP address. It's a simple defence, but it works.
- Restrict Sign-ups: Unless you have a specific reason to run an open platform, disable public sign-ups. This is a huge step in preventing spam accounts and shrinking your attack surface.
- Audit Admin Accounts Regularly: Keep the number of users with admin-level permissions to an absolute minimum. I recommend reviewing these accounts quarterly and immediately removing anyone who no longer needs that level of access.
Beyond these basics, connecting your instance to a centralised identity provider is a massive security win.
Streamlining Access with SSO
Managing user accounts locally becomes a real headache as your team grows. Setting up Single Sign-On (SSO) with a provider like Azure AD or Okta is the answer. It centralises user management and massively improves your security posture.
Think about it: when someone leaves the company, their access is revoked in one central place, which automatically locks them out of GitLab and everything else. This completely eliminates the risk of forgotten or orphaned accounts and makes onboarding and offboarding a breeze.
Setting up SSO isn't just about convenience—it's a foundational security practice. You're shifting the burden of identity verification to a specialised service, which lets you enforce consistent access policies across your entire organisation.
Building a Bulletproof Backup Strategy
Your GitLab instance holds some of your company's most valuable intellectual property: your source code. A catastrophic failure without a solid backup plan could be devastating. Your strategy needs to be automated, tested, and stored safely off-site.
Just running the backup command isn't a strategy. You need a reliable, end-to-end process.
- Automate Daily Backups: Use a cron job or systemd timer to trigger the built-in GitLab backup task every night. Pick a time with low traffic.
- Encrypt Your Backups: Before you send your backup archives anywhere, encrypt them using GPG or a similar tool. This ensures that even if the files are somehow intercepted, their contents are useless to anyone else.
- Use Off-Site Storage: Automatically copy those encrypted backups to a remote, secure location. This could be an Amazon S3 bucket, Azure Blob Storage, or even a separate physical server in another data centre. The golden rule is: never store backups on the same machine as your GitLab instance.
- Test Your Restores: A backup you haven't tested is just a hope. At least once a quarter, you need to perform a full restore to a temporary server. This verifies the integrity of your backups and gives you practice with the recovery process so you're not fumbling in a real emergency.
This robust approach means you can recover quickly and completely from almost anything—hardware failure, data corruption, or even a ransomware attack. That peace of mind is invaluable, particularly for organisations in the DE region where data integrity is paramount. For context, some managed hosting partners build their entire business on this kind of reliability, with some reporting over 25,000+ daily active users on their platforms. You can find more details by researching managed GitLab solutions.
Navigating Upgrades and Monitoring
Keeping your instance up-to-date is crucial, both for security patches and getting access to new features. GitLab releases a new version every single month. If you fall too far behind, the upgrade process can become a complex and painful project.
The best practice is to take small, frequent steps. Avoid trying to jump across multiple major versions at once. Instead, upgrade one or two minor versions at a time, and always read the release notes carefully for any breaking changes or required migration steps.
To make sure everything is running smoothly after an upgrade (and every day, for that matter), proactive monitoring is key. GitLab comes with Prometheus monitoring built-in, which exposes a goldmine of metrics. Here’s what you should be watching:
- System CPU and Memory Usage: Sudden spikes can point to a runaway process or a server that's simply out of resources.
- Sidekiq Queue Length: If this queue is always growing, it means your background jobs can't keep up. This can delay everything from CI/CD pipelines to email notifications.
- Puma Worker Saturation: This metric tells you if your web server is struggling to handle incoming user requests, a classic sign that you need to scale up.
By actively securing, backing up, and monitoring your GitLab instance, you transform it from a simple tool into a resilient, enterprise-grade platform that your development team can depend on.
Unlocking Advanced Self-Hosted Features
When you run your own GitLab instance, you're opening the door to capabilities that standard SaaS plans just can't touch. This is the point where you graduate from basic source control and start building a genuinely tailored, high-performance DevOps environment. The real magic lies in the complete control you have, especially for integrating AI and engineering truly resilient, fault-tolerant systems.
One of the biggest draws to self-hosting is the freedom to use advanced AI features without ever sending your proprietary data off-site. For any organisation serious about protecting its intellectual property or complying with strict data privacy laws like GDPR, this isn't just a benefit—it's a necessity.
Embracing AI with Full Data Control
GitLab Duo is packed with useful AI tools like Code Suggestions, but on the cloud, your code gets processed by external services. With GitLab self-hosting, you can bring the full power of large language models (LLMs) right into your private network. This simple shift ensures your most sensitive code never leaves your perimeter.
This capability marked a huge step forward for organisations in the DE region. The game-changer arrived on February 20, 2025, when version 17.9 made GitLab Duo Self-Hosted generally available. This release empowers DE organisations to deploy powerful LLMs—like Mistral on vLLM, Claude 3.5 Sonnet on AWS Bedrock, or OpenAI models via Azure OpenAI—entirely on-premises or within a private cloud. It's a direct answer to GDPR and data residency concerns. You can read more about how GitLab is enabling self-hosted AI platforms.
What does this mean in practice? Your teams get the massive productivity boost of AI-driven development, but without the compliance headaches. Developers receive intelligent code completions and workflow insights, all generated by a model running on servers that you control.
By running your own LLMs, you transform AI from a potential data risk into a secure, internal tool. It's the ultimate expression of data sovereignty, giving you the benefits of modern AI without compromising on privacy.
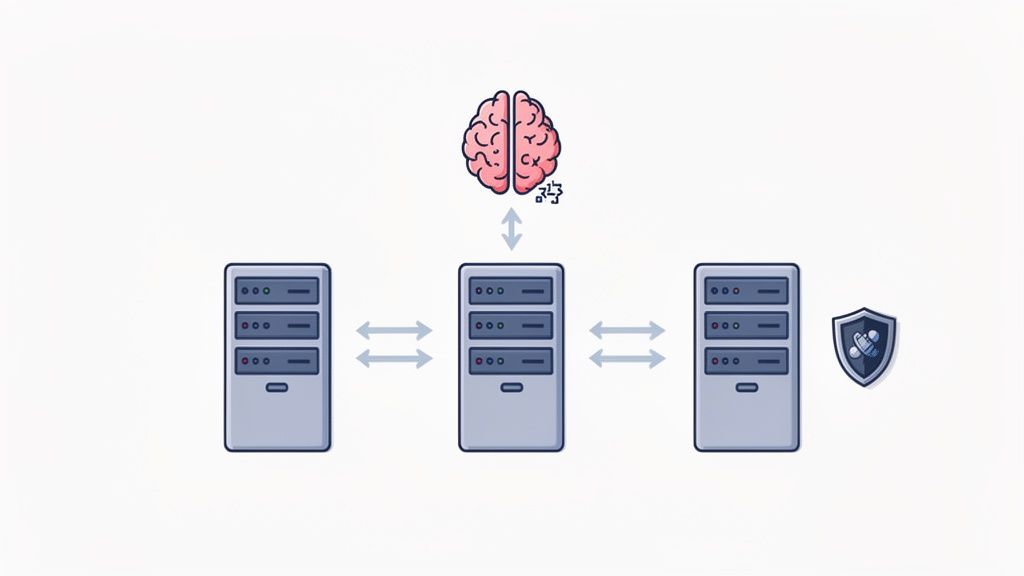
Building for High Availability and Geo-Redundancy
For any business where downtime is simply not an option, self-hosting is the only path to a truly fault-tolerant DevOps platform. Your GitLab instance is the heart of your software delivery pipeline; if it goes down, development grinds to a halt. Self-hosting gives you the architectural control to build a system that can weather almost any storm.
This means moving beyond a single server and into a more sophisticated, resilient configuration. Some of the core strategies you'll want to consider include:
- High Availability (HA): This is all about redundancy. A typical HA setup involves a multi-node architecture where critical components like the web server, database, and Redis are duplicated. If one node fails, another one steps in automatically, keeping the service online with minimal disruption.
- Geo-Redundancy: Think of this as your disaster recovery plan. You replicate your entire GitLab instance to a secondary data centre in a completely different geographical location. If a major outage hits your primary site, you can failover to the secondary one and keep your teams productive.
- Database Clustering: Instead of relying on a single PostgreSQL instance—a classic single point of failure—you can implement a robust cluster using tools like Patroni. This provides automatic failover for your database, arguably the most critical piece of the puzzle.
Putting these systems in place demands real technical expertise and meticulous planning. But the payoff is a mission-critical platform that meets the most stringent enterprise uptime requirements. It gives you the peace of mind that your development engine is protected from both minor hardware glitches and major regional disasters. To get the most out of such a powerful setup, our guide to GitLab CI rules for smarter pipelines offers practical tips for streamlining your operations.
Common Questions About Self Hosting GitLab
Stepping into the world of self-hosting GitLab naturally brings up a few questions, especially around the practical, day-to-day realities of managing your own instance. We’ve covered a lot of ground on the 'how,' but this section zeroes in on the 'what ifs' and 'how muches'. These are the most common queries we see from teams, answered directly to give you clarity and confidence.
Think of this as the practical advice you'd get from a seasoned administrator over a cup of coffee. No fluff, just straightforward answers to help you navigate your journey.
What Are the Real Costs of Self Hosting GitLab?
It's easy to look at the free Community Edition and think the main cost is just the server, but the true picture is much broader. To get a realistic idea, you need to think in terms of the Total Cost of Ownership (TCO), which is a blend of a few key things.
First, there are the direct infrastructure costs. This is the monthly bill for your virtual or physical servers, your storage volumes, and any network bandwidth you consume. These are the most obvious expenses and will naturally scale with your team's size and activity.
Then you have GitLab licensing fees. While the Community Edition is incredibly powerful and completely free, many organisations eventually need the features found in the Premium or Ultimate tiers. These are priced per-user, per-year, so this cost is directly tied to your team's headcount.
Finally—and this is the one people almost always underestimate—are the operational costs. This is the value of your engineering team's time spent maintaining the instance. It covers everything from the initial setup and regular upgrades to managing backups, monitoring performance, and troubleshooting issues. This "people cost" is often the largest part of the TCO and is absolutely critical to factor into your budget.
How Hard Is Migrating from GitLab.com?
Moving from the cloud at GitLab.com to your own self-hosted instance is a well-trodden path, but it's not a simple one-click affair. The difficulty really hinges on the scale and complexity of your operation. Careful planning is what separates a smooth transition from a weekend of chaos.
GitLab provides built-in export and import tools that handle the heavy lifting for your projects, including repositories, issues, and merge requests. The real challenges, however, lie in the details.
The biggest hurdles you'll likely face are:
- Version Compatibility: Your new self-hosted instance must be running the exact same version of GitLab as GitLab.com at the moment you perform the export. This can require some careful timing.
- Downtime Planning: For the final data sync, you'll need to schedule a maintenance window where your team can't push code or update issues. Communicating this clearly is essential.
- Reconfiguring Integrations: All your CI/CD runners, webhooks, and third-party application integrations will need to be meticulously reconfigured to point to your new self-hosted domain.
My best advice is to always perform a trial run. Migrate a few non-critical projects first. This lets you iron out any kinks in your process and build a reliable playbook before you touch your most important codebases.
Can I Use My Own CI/CD Runners?
Yes, absolutely—and this is one of the most powerful advantages of running your own GitLab instance. When you self-host, you get total control over the environment where your build, test, and deployment jobs run. This is a massive unlock for performance, security, and customisation.
This control allows you to provision runners on specialised hardware. For example, you can set up runners on machines with powerful GPUs for machine learning workloads or on macOS machines to build and sign iOS applications. You’re also free to install any custom software, libraries, or dependencies your build jobs require, without being limited by a shared runner environment.
From a security standpoint, keeping your runners inside your private network is a huge win. This is essential when your CI/CD jobs need to access internal databases, artifact repositories, or other services that should never be exposed to the public internet. You can register and manage these runners directly from your GitLab instance's admin panel, giving you a centralised view of your entire build fleet.
What Is the Difference Between CE and EE?
This is a frequent point of confusion, so let's clear it up. GitLab comes in two main "editions": Community Edition (CE) and Enterprise Edition (EE).
GitLab Community Edition (CE) is the free and open-source version. It contains all the core features you need for a complete DevOps platform, from source code management and CI/CD to package registries. It's incredibly capable and is often more than enough for smaller teams and personal projects.
GitLab Enterprise Edition (EE) is the commercial platform that is built directly on top of CE. The key thing to understand is that you can download and install EE for free, and without a licence, it functions identically to CE. The magic happens when you apply a paid subscription.
Purchasing a Premium or Ultimate subscription simply unlocks the advanced features that are already present in the EE codebase. These include things like:
- Advanced security scanning (SAST, DAST, dependency scanning)
- Portfolio and compliance management tools
- High-availability and geo-redundancy support
Your choice really boils down to your organisation's specific needs. If you require enterprise-grade security, compliance, and scalability features, then purchasing a subscription for EE is the way to go. Otherwise, the free CE provides a phenomenal amount of value right out of the box.
At Acquispect, we believe that verifiable skill, not just a well-written CV, should define professional opportunity. Our platform is built to create a trust layer for the digital economy, where your work speaks for itself. Discover how we're building a true meritocracy. Learn more about Acquispect.