Connecting your GitLab and Jira instances is the secret to a genuinely transparent development workflow. It’s about more than just convenience; it’s about tearing down the walls between planning and doing. When you link code commits, merge requests, and CI/CD pipelines directly to Jira issues, you get something special: less manual drudgery for developers and crystal-clear visibility for project managers.
Why Connecting GitLab and Jira Is a Game Changer
Let’s be real for a moment. Constantly switching between tools is a massive drain on productivity. Your developers are happiest in GitLab, shipping code and managing pipelines. Meanwhile, your project managers live in Jira, orchestrating timelines and tracking progress. That gap between them? That’s where crucial information gets lost, updates slip through the cracks, and team friction starts to build.
A solid GitLab and Jira integration closes that gap. It creates a single source of truth that helps everyone, from the developer at the keyboard to the stakeholder in the boardroom. Instead of a developer having to stop what they're doing to manually update a Jira ticket after a commit, the integration handles it. A merge request simply needs to mention the Jira issue key, and poof—the activity shows up right there in the Jira ticket. It’s a simple connection that eliminates context switching and keeps the entire team synchronised without any extra effort.
Unlocking True Development Visibility
The real magic happens when project managers can see development progress without ever having to leave Jira. They get a live feed showing which branches are active, what commits have been made, and the status of merge requests—all tied to a specific user story. This kind of transparency builds trust and makes those endless "what's the status on this?" meetings a thing of the past.
The benefits become obvious almost immediately:
- Automated Status Updates: Commits and merge requests automatically update their corresponding Jira issues.
- Enhanced Traceability: You get a clear, auditable trail from a requirement in Jira straight to the code that fulfils it.
- Improved Collaboration: Technical and non-technical team members can finally speak the same language, working from a shared view of project progress.
- Faster Feedback Loops: QA testers can see the moment code is ready for their review, right inside the Jira ticket.
Meeting Compliance and Data Residency Needs
For many organisations, especially in Europe, data sovereignty isn’t a nice-to-have—it’s a legal necessity. A robust integration has to respect these regulations without getting in the way. This has become a huge consideration for teams in the DE region who are bound by strict GDPR compliance.
For example, late in 2022, the Git Integration for Jira Cloud app began offering data hosting options in Germany, giving teams the ability to keep their Git data within EU borders. By 2023, reports showed that over 70% of German tech companies on Atlassian products had opted for EU-hosted instances, which naturally drove adoption of integrations that could provide development insights directly within Jira. You can explore more about these regional data hosting advancements and see how they're impacting team workflows.
A successful integration isn’t just about connecting two APIs. It's about fundamentally changing how your teams communicate, making your software delivery lifecycle more efficient, transparent, and compliant. It transforms two separate tools into one cohesive platform.
Setting the Stage for a Smooth Integration
Before you even think about clicking into configuration screens, a little prep work is crucial for a solid GitLab and Jira integration. Trust me, taking a few minutes now is like a pre-flight check that helps you sidestep the common issues that can turn a simple setup into a day-long troubleshooting nightmare. The route you take will hinge entirely on your team's specific setup—whether you're all-in on the cloud or managing your own servers.
First things first, you need to know your environment. The integration steps aren't a one-size-fits-all deal; they change depending on your mix of tools. For instance, connecting GitLab.com with Jira Cloud is usually the most straightforward path, as it relies on ready-made marketplace apps and managed infrastructure. But if your team is running a self-managed GitLab instance, you’ve got to think about network access, especially if you’re trying to link up with Jira Cloud. Jira needs to be able to reach your GitLab server, which can mean some network wrangling.
This is exactly why we integrate in the first place—to break down those frustrating silos and kill off all that manual, redundant work.
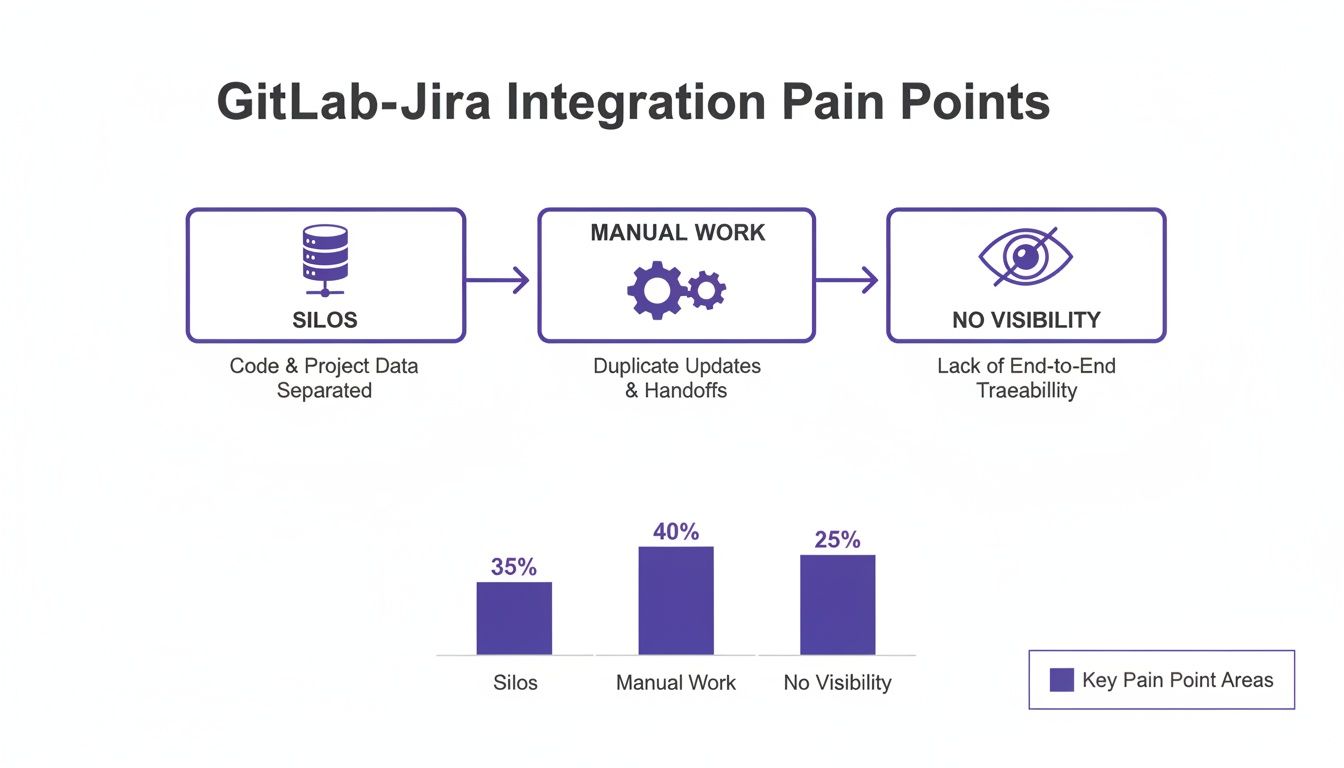
Seeing the pain points laid out like that really drives home why getting this connection right is so important. It’s about transforming a clunky, disjointed process into a single, transparent workflow.
Choosing Your GitLab and Jira Integration Path
The specific combination of GitLab and Jira you're running will define your setup requirements. Each scenario comes with its own networking quirks and feature sets. Getting this choice right from the start means you’ll have access to everything you need without hitting a technical brick wall down the line.
To help you figure out the best approach for your team, here’s a quick comparison of the most common setups.
| Integration Aspect | GitLab.com with Jira Cloud | Self-Managed GitLab with Jira Cloud | Self-Managed GitLab with Jira Data Center | | :--- | :--- | :--- | :--- | | Network Needs | No special configuration needed. | Your GitLab instance must be publicly accessible. | Both instances must be able to communicate on your private network. | | Primary Setup | GitLab for Jira Cloud app from Atlassian Marketplace. | GitLab for Jira Cloud app + ensuring network visibility. | Direct project integration configured within GitLab and Jira. | | Key Advantage | Simplest setup with minimal administrative overhead. | Full control over your GitLab instance while using Jira's SaaS benefits. | Maximum data control and customisation within a private ecosystem. | | Common Hurdle | Relying on Atlassian and GitLab for uptime and features. | Firewall and network security group (NSG) configuration. | Managing server maintenance, updates, and networking for both tools. |
As you can see, while a full-cloud setup is the path of least resistance, self-managed options give you much tighter control. This is a massive plus for organisations with strict data residency or security policies. This decision has become even more critical as some vendors move away from self-hosted solutions, whereas GitLab remains steadfast in its support for deployment flexibility. If this is a concern for you, it's worth taking a look at GitLab's commitment to deployment choice to see how it might affect your long-term strategy.
Authentication and Permissions Done Right
One of the most critical decisions you'll make is how the two systems authenticate with each other. It’s tempting to just use a personal access token (PAT) from your own account to get things moving quickly, but that's a classic mistake for a production integration. The minute you leave the company or your permissions are tweaked, the whole thing breaks.
The gold standard here is to create a dedicated service account in both GitLab and Jira. This simple step decouples the integration from any single person, making it far more robust and a whole lot easier to manage and audit.
This dedicated user should be granted just enough permissions to do its job and nothing more—the principle of least privilege in action.
Here’s what that typically looks like:
- In GitLab: The service account needs at least the Maintainer role on the projects or groups you want to integrate. The Owner role also works, but it's overkill and gives it more power than necessary.
- In Jira: The service account will need administrative permissions to set up webhooks and access project data. The easiest way is often to assign it to the
jira-administratorsgroup.
Nailing these permissions right from the get-go will save you from the number one cause of integration failures. It ensures the two systems can talk to each other properly, paving the way for a smooth flow of information between your development and project management worlds from day one.
Alright, you've got the prerequisites sorted. Now for the fun part: making GitLab and Jira actually talk to each other. This is where you bridge the gap between your code and your project plan, giving developers the focus they crave and project managers the visibility they need.
The whole setup is managed right inside your GitLab project settings, which is a smart design choice. It keeps things tidy, letting you handle connections on a project-by-project basis or even at a group level if you want to apply the same settings across the board. To get started, you'll need Maintainer or Owner permissions for the GitLab project.
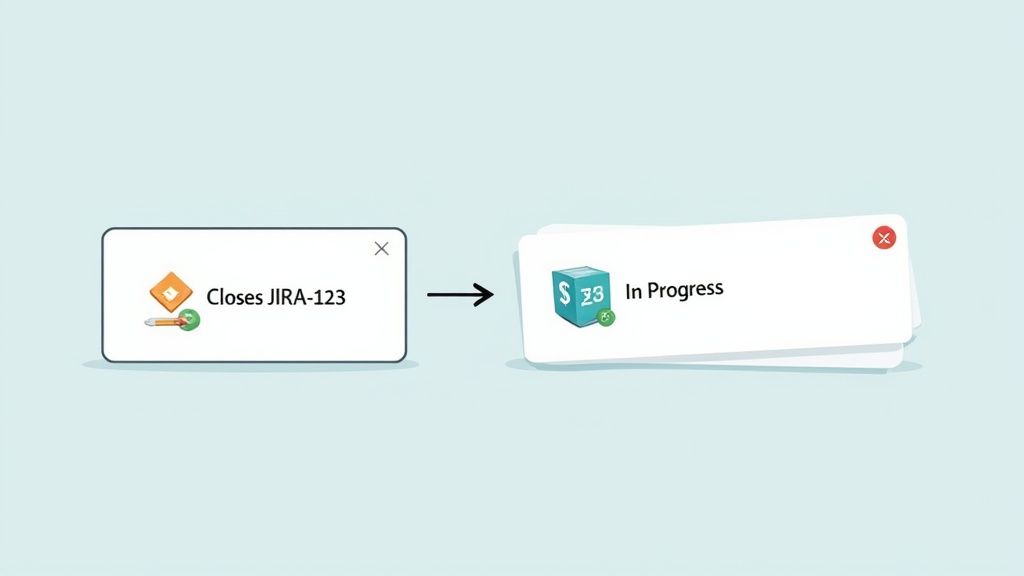
This simple connection is the first step toward creating powerful automated workflows like the one pictured above. The goal is to make actions in your repository trigger meaningful updates in your project management tool, all without lifting a finger.
Activating the Jira Integration
First up, head to the GitLab project you want to connect. In the left-hand navigation, find your way to Settings > Integrations. You'll see a big list of services you can link up with; scroll down until you find Jira and give it a click. This is your command centre for the integration.
The configuration page that opens will ask for a few key details to get the connection working.
- Web URL: This is simply the main address for your Jira instance, like
https://your-company.atlassian.net. - Jira project key: The short-form identifier for your project, something like
PROJorDEV. - Username or Email: Pop in the email address of the dedicated service account you set up earlier.
- API token or Password: Here's a crucial point: for Jira Cloud, you must use an API token. If you're on Jira Data Center, the service account's password will do the trick.
Once you’ve filled those fields out, hit the "Test settings" button. A green "Connection successful" message is what you're looking for—it means GitLab and Jira are officially shaking hands.
A common tripwire here, especially with self-managed instances, is a basic network issue. If that test fails, the very first thing to check is whether your GitLab server can actually reach your Jira URL. Make sure a firewall isn't standing in the way.
With the basic link established, it's time to unlock the real power by customising how the two systems interact.
Configuring Your Integration Triggers
Now that the connection is live, you'll see a "Triggers" section with several options. These settings dictate what automatically happens when a developer references a Jira issue key from within GitLab. Let's walk through the most important ones.
- Commit: Ticking this box means any commit message that includes a Jira issue key (e.g.,
git commit -m "Fix login bug - PROJ-123") will automatically post a comment on that Jira ticket. That comment links right back to the commit, creating a perfect, effortless audit trail. - Merge request: This one adds a comment to the Jira ticket whenever a merge request mentioning the key is created or merged. It’s an incredibly simple way to notify the project team that a fix is up for review or has been shipped.
These triggers form the backbone of the integration. They provide passive, automatic updates that keep everyone on the same page without anyone having to do manual tracking.
You can take this even further by enabling automatic issue transitions. This lets you specify keywords that will move a Jira issue to a different status. For instance, you could configure it so a commit message with "Closes PROJ-123" automatically transitions the Jira ticket from In Progress to Done. This feature alone can save your team hundreds of clicks every single month.
A Real-World Example in Action
Let's see how this plays out for a developer named Sarah. She's been assigned a bug fix, tracked in Jira as DEV-451, which is currently sitting in the To Do column.
- She starts working: Sarah creates a new branch in GitLab:
fix/DEV-451-user-auth-bug. The integration spots theDEV-451key and instantly adds a comment to the Jira ticket, linking to her new branch. The project manager immediately sees that work has begun. - She commits her fix: After sorting out the code, she commits her changes with the message:
Fix user authentication flow, resolves DEV-451. A new comment appears on Jira ticketDEV-451, linking to the exact commit details. - She opens a merge request: Sarah creates an MR titled "Fix user auth bug DEV-451". You guessed it—another comment pops up in Jira, this time linking directly to the MR for code review.
- The MR gets merged: Once her code is approved, the MR is merged into the main branch. Because she used the keyword "resolves", the integration automatically moves the
DEV-451ticket fromIn Progressstraight toDone.
Sarah never had to leave her command line or the GitLab UI, yet she kept the entire team perfectly informed. This is the real-world value of a properly set up integration. The widespread adoption of this integration, particularly in the DE region, highlights its efficiency and robust support for various Jira versions. For context, GitLab's own importer tool once moved a 500 GiB repository with 13,000 pull requests in just eight hours. You can dive deeper into GitLab's detailed Jira integration capabilities on their official documentation page.
Bringing Development Insights into Jira
Mentioning a Jira issue in a commit message is a great start, but it's really just scratching the surface. The true magic happens when you pull rich, real-time development context directly into your Jira issues. This is where the Jira Development Panel comes into its own, turning a simple ticket into a live dashboard of engineering activity.
Forget chasing down developers for status updates or digging through GitLab to see what’s happening. This setup puts everything you need—branches, commits, merge requests, even pipeline status—right inside Jira.
The linchpin for this whole process is the GitLab for Jira Cloud app, which you can find on the Atlassian Marketplace. Think of it as the translator between GitLab and Jira. It's what allows GitLab to push all that valuable development data into the corresponding Jira issue, giving project managers and QA testers a clear line of sight without ever leaving their preferred tool.
The image below shows you exactly what you're looking for in the marketplace.
Hitting that ‘Get it now’ button is the first step towards fundamentally changing how your teams collaborate by embedding development reality directly into your project management workflow.
Installing the GitLab for Jira Cloud App
Getting this set up is surprisingly straightforward. If you're a Jira administrator, you can install the app right from the Atlassian Marketplace. Just head over to Apps > Find new apps, search for "GitLab for Jira Cloud", and click "Get app".
Once it's installed, you’ll see a "Get started" button. This kicks off the configuration, where you'll link your GitLab namespaces (your top-level groups) to your Jira instance. This is a crucial step, as it tells the app which GitLab projects should sync their data.
You'll need a couple of things on hand:
- Your GitLab URL: This is just
https://gitlab.comif you're on the cloud version. For self-managed instances, you'll use your own domain. - A Personal Access Token: Here’s a pro tip: create a dedicated 'bot' or service user in GitLab for this integration. Grant it a personal access token with
apiscope. This is much better than using a personal account, which could cause the integration to break if that person ever leaves the company.
After you’ve added a GitLab namespace, the app gets to work syncing data. From that point on, any time a developer mentions a Jira issue key in a branch name, commit message, or merge request title, that activity will pop up in the Jira Development Panel automatically.
The real win here is the death of context switching. A project manager can glance at a Jira ticket and not just see that it’s ‘In Progress’, but also that two branches have been created, five commits have been pushed, and a merge request is up for review. That level of detail makes sprint planning and daily stand-ups infinitely more productive.
Unlocking a Transparent Workflow
With the Development Panel humming along, every stakeholder gets an immediate, at-a-glance view of all the engineering work tied to a ticket. This isn't just convenient; it's powerful.
Imagine a QA engineer opening a ticket. They can instantly see the exact merge request with the fix they need to test, and they can even see the CI/CD pipeline status to confirm the build passed before they pull it down. No more asking, "Is this ready for testing yet?"
This seamless information flow is exactly what modern software teams need, especially those focused on improving DORA metrics. As Atlassian’s documentation points out, showing CI/CD data on Jira boards and release pages helps break down the classic silos between teams. In fact, surveys in Germany have revealed that this kind of connected tooling can boost productivity by as much as 40%. You can dive deeper into how Atlassian enables this powerful GitLab integration within Jira and its benefits.
Ultimately, this integration solves a core problem: the communication gap between the code and the plan. It automates the tedious parts of status reporting, letting developers focus on shipping code while giving everyone else the real-time insights they need to make better, faster decisions. The result is a more aligned, efficient, and transparent delivery process from start to finish.
Automating Your Workflow with Advanced Techniques
So, you've got the basic connections sorted, and your teams are already seeing the benefits. That's great, but now it's time to really let this integration fly. We're going to build a truly intelligent and automated workflow that weaves itself into your entire software delivery process.
This goes way beyond simple notifications. We’re talking about making your GitLab and Jira integration an active, thinking participant in how you build software.
Think about it: GitLab CI/CD jobs that intelligently update Jira issues, Jira rules that kick into action based on what’s happening in a repository, and automated checks that guarantee full traceability. When you get this right, it stops feeling like two separate tools and starts feeling like one seamless, unified platform.
Automating Jira Transitions from GitLab CI/CD
One of the most impactful automations you can set up is letting your CI/CD pipeline drive your Jira board. Picture this: a pipeline succeeds, and the corresponding Jira issue automatically slides into the "Ready for QA" column. No human intervention needed. If that same pipeline fails, the ticket can be bumped back to "In Progress" and the developer gets a notification.
This completely removes the tedious task of developers having to remember to update their tickets after a build. The pipeline becomes the single source of truth for an issue's development status.
So, how do you do it? The secret is making direct Jira Cloud Platform REST API calls right from your .gitlab-ci.yml file. You'll typically use a tool like curl and a secure project variable to hold your Jira API token so it's not exposed in your script.
Here's a real-world example of how a script in a CI/CD job could handle this:
transition_jira_on_success:
stage: deploy
script:
- JIRA_ISSUE_KEY=$(echo $CI_COMMIT_MESSAGE | grep -o -E '[A-Z]+-[0-9]+')
- |
if [ -n "$JIRA_ISSUE_KEY" ]; then
curl --request POST
--url "https://your-domain.atlassian.net/rest/api/2/issue/${JIRA_ISSUE_KEY}/transitions"
--user "your-email@example.com:${JIRA_API_TOKEN}"
--header 'Accept: application/json'
--header 'Content-Type: application/json'
--data '{"transition":{"id":"31"}}' # '31' is the ID for "Ready for QA"
else
echo "No Jira issue key found in commit message."
fi
rules:
- if: '$CI_COMMIT_TAG || $CI_COMMIT_BRANCH == "main"'
when: on_success
Expert Tip: That transition ID ("31" in the example) isn't universal. It’s specific to your Jira workflow. You can easily find the correct ID by querying the Jira API for a specific issue:
GET /rest/api/2/issue/{issueIdOrKey}/transitions. This makes sure your script is always pushing the ticket to the right column.
Creating Reactive Automation Rules in Jira
The conversation between GitLab and Jira isn't a one-way street. Jira's own automation engine is incredibly versatile and can be set up to react to events happening in GitLab. Using incoming webhooks from GitLab, you can build powerful rules that respond to key development milestones.
For instance, you could configure a GitLab webhook to fire every time a merge request is approved. That webhook would then hit a Jira endpoint, triggering an automation rule that does the following:
- When: A webhook is received with data flagging an "approved" MR.
- If: The linked Jira issue's status is "In Review".
- Then:
- Transition the issue to "Ready for QA".
- Re-assign the issue to the lead QA engineer.
- Post a comment: "Merge request has been approved. Ready for testing."
This creates a highly responsive workflow where Jira doesn’t just passively display development data—it actively participates and moves work forward.
Enforcing Compliance with Merge Request Checks
For any team working in a regulated space or with strict auditing needs, total traceability is a must-have, not a nice-to-have. Your GitLab and Jira integration is the key to building an ironclad compliance strategy.
GitLab has built-in features to enforce a simple but powerful rule: every single line of code that gets merged can be traced back to a planned piece of work in Jira.
You can configure this directly in your GitLab project settings to require a Jira issue key in all merge request titles.
It's a simple checkbox that enforces a crucial process:
- In your GitLab project, go to Settings > Merge requests.
- Find the "Merge checks" section and tick the box for "Require an associated issue from Jira."
Once you flip that switch, GitLab will physically block any merge request that doesn't have a valid Jira issue key in its title. This small change makes it impossible for "rogue" code to slip into your main branch without a corresponding requirement or bug report tracked in Jira. The result is a fully auditable software delivery lifecycle, giving you massive gains in governance and accountability.
Navigating Common Integration Problems
Even with the most meticulous setup, your GitLab and Jira integration can occasionally hit a snag. The good news is that most issues are minor and easy to fix, but they can certainly be frustrating if you don’t know where to start looking. Let's walk through a few of the most common hiccups I've seen and get your workflow back on track.
One of the first signs of trouble teams often see is a complete connection failure. You hit the "test connection" button in GitLab, and it just errors out. Before you start digging through server logs, it pays to check the simple things first. You’d be surprised how often the culprit is a small oversight.
Another classic issue is the Jira development panel remaining stubbornly empty, even when developers are diligently mentioning issue keys in their commit messages. This almost always points to a problem with the GitLab for Jira Cloud app's configuration, not the core integration itself.
A Quick Diagnostic Checklist for Integration Snags
When things go wrong, running through a quick diagnostic checklist can solve the vast majority of problems I encounter out in the wild.
- Check Your User Permissions: Make sure the service account you’re using has, at a minimum, Maintainer permissions in GitLab and admin rights in Jira. This is, without a doubt, the number one cause of failed connections.
- Inspect Firewall and Network Rules: If you're running a self-managed GitLab instance trying to talk to Jira Cloud, your GitLab server must be reachable from the public internet. A misconfigured firewall or an overly aggressive network security group is a classic blocker for Jira’s incoming webhooks.
- Confirm Jira Issue Key Formatting: A simple typo can bring everything to a halt. Always double-check that your commit messages and branch names are using the correct, full Jira project key. It should look like
PROJ-123, notPROJ 123or just123.
My Top Tip: Always, and I mean always, use a dedicated service account for the integration. Tying this critical connection to an individual's personal account is a ticking time bomb. The moment that person changes roles or leaves the company, the entire integration will break, often without any warning.
Keeping the Integration Healthy for the Long Haul
Fixing a broken connection is one thing, but keeping it running smoothly as your team grows is another challenge entirely. A little proactive care goes a very long way.
Start by establishing clear, team-wide conventions for your commit messages. Agree on a standard set of keywords—like resolves, closes, or fixes—that will automatically trigger issue transitions in Jira. This kind of consistency prevents a lot of confusion and ensures the automation works reliably for everyone on the team.
Finally, get into the habit of auditing the integration’s permissions every so often. As your projects and teams change, you need to make sure the service account's access is still appropriate. This simple security check is key to maintaining a stable, secure connection, preventing any unauthorised access, and keeping your development workflow transparent and efficient.
Common Questions About the GitLab and Jira Hookup
Even with the best guides, you're bound to hit a few specific questions when you're in the trenches setting up a new integration. I get these a lot, so I’ve put together some quick answers to the most common sticking points I see with the GitLab and Jira integration.
Can I Link One GitLab Project to Multiple Jira Projects?
This is a big one. People often want to link a single GitLab repository to several Jira projects, but the native integration doesn't quite work that way.
Out of the box, you get a one-to-one link: one GitLab project connects to one Jira project. If you need to mention an issue from a different Jira project, your only real option is to paste the full issue URL into your commit message. Just be aware that when you do this, you won't get any of the slick automated features like status updates for those cross-project mentions.
Is It Better to Set Up the Integration at the Group Level?
Absolutely. If you manage more than a couple of projects, configuring the integration at the GitLab group level is a massive time-saver and the best way to keep things consistent.
When you set it up at the group level, every project underneath it automatically inherits those settings. This means you don't have to manually configure every single new project, which is a huge win. It also ensures all your teams are playing by the same rules. And if you have a special case? No problem, you can always override the group settings on a specific project that needs a unique setup.
For larger organisations, this group-level approach is a lifesaver. It makes onboarding new projects a breeze and practically eliminates configuration drift, which can cause all sorts of headaches down the line.
What Happens if My Jira API Token Expires?
It's not a matter of if, but when. When the Jira API token expires, the integration will just stop. You'll suddenly realise that commit messages and merge request comments aren't showing up in your Jira tickets anymore, and none of your automated workflow triggers are firing. It usually fails silently, which can be confusing at first.
Fixing it is simple, though. A Jira admin just needs to pop into their Atlassian account settings and generate a fresh API token. Then, you just need to paste that new token back into the integration settings in GitLab, and everything will spring back to life.
At Acquispect, we believe your work should speak for itself. We're building the trust layer for the digital economy, replacing resumes with verifiable proof of your skills. See how we're building a true meritocracy.