Opting to self-host Jira puts you in the driver's seat, giving you total command over your data, security, and how the platform is customised. For any organisation navigating strict compliance requirements, this level of control isn't just a "nice-to-have"—it's often a necessity. This approach keeps your entire Jira instance tucked safely within your own infrastructure, which is perfect for deep, custom integrations and meeting specific data sovereignty rules.
Why Self-Host Jira in a Cloud-First World?

With SaaS solutions dominating the software world, choosing to self-host Jira might seem like swimming against the current. But for many businesses, it’s a strategic move, not just a technical preference. This is especially true for those in tightly regulated sectors like finance, healthcare, or government, where the reasons go far beyond convenience and touch on fundamental business needs.
Absolute Data Sovereignty
The number one reason companies stick with self-hosting? Data sovereignty. It’s the simple idea that your data is governed by the laws of the country where it's collected and stored. For businesses in Europe, for example, regulations like GDPR are incredibly strict about where personal data can live and how it's handled. Self-hosting is the only way to be 100% certain your Jira instance—and all its sensitive project data—stays on your servers, within your country's borders.
It removes all the grey areas. While cloud providers offer regional data centres, you never have the same degree of certainty. In fact, Atlassian only introduced a specific German data residency option in late 2023 after years of hearing from German customers worried about where their data was really going. Before that, there was always a lingering doubt that things like analytics or user account details might be processed outside Germany. That uncertainty alone was enough to keep many organisations firmly in the self-hosted camp. You can read more about the German data residency rollout and its implications.
Unrestricted Customisation and Integration
The other big draw is the freedom to customise and integrate without limits. Jira Cloud has a fantastic app marketplace, but nothing beats the raw control of a self-hosted environment. The practical benefits are huge:
- Legacy System Integration: Many large enterprises run on custom-built, on-premise systems that don't play nicely with cloud services. A self-hosted Jira instance can be woven directly into this existing tech stack.
- Complete Scripting Freedom: You can get under the hood to modify configuration files, run your own scripts on the server, and fine-tune performance in ways that are simply off-limits in the cloud.
- Control Over Update Cycles: You get to decide when—and if—you upgrade. This is vital for any team that needs to run rigorous tests and validate changes before rolling out a new version, ensuring critical workflows never break.
Choosing to self-host Jira isn't about clinging to an old method. It's a conscious decision to prioritise ultimate control, security, and integration over the convenience of a managed service. When your operations depend on it, that control is everything.
Preparing Your Infrastructure For Jira Data Center
Setting up a self-hosted Jira instance is a bit like laying the foundation for a house. If you get it wrong, everything you build on top of it will be shaky. Before you even think about downloading an installer or running a command, getting your infrastructure right is the single most important thing you can do for long-term performance and stability. Trust me, spending the time here will save you from countless late-night troubleshooting sessions down the road.
One of the most common pitfalls I see is teams under-provisioning their servers, assuming they can just add more resources later. While technically true, starting with an undersized server almost always leads to immediate performance bottlenecks. This frustrates users right out of the gate and can torpedo adoption before you've even started. Proper planning isn't just a suggestion; it's essential for a successful Jira Data Center deployment.
Sizing Your Servers Correctly
The first question everyone asks is, "How much hardware do I actually need?" The honest answer is: it depends. The key factors are your number of active users and, just as importantly, how they use Jira. A team of 50 developers hammering the system with complex JQL queries and heavy automation will put a much greater strain on it than 200 users who only pop in to view dashboards.
While Atlassian provides official sizing guides, real-world experience gives us a more practical baseline. Think of the numbers below as a solid starting point, but always be prepared to monitor your system's performance closely after launch and adjust as needed.
This quick reference table should help you estimate your initial server needs.
Jira Data Center Sizing Recommendations
| Team Size (Users) | Recommended vCPUs | Recommended RAM | Estimated Disk I/O | | :--- | :--- | :--- | :--- | | Small (1 - 250) | 4 - 8 | 16 GB | Fast SSD (Low) | | Medium (250 - 1000) | 8 - 16 | 32 GB | Fast SSD (Medium) | | Large (1000 - 2000) | 16 - 24 | 48 - 64 GB | NVMe SSD (High) | | Enterprise (2000+) | 24+ | 64+ GB | NVMe SSD (High) |
These are just guidelines, of course. Your mileage may vary based on your specific usage patterns.
A crucial factor that often gets overlooked is disk I/O. Jira is constantly reading from and writing to its search index, and slow storage is one of the most common culprits behind a sluggish instance. Don't skimp here. Always go for enterprise-grade SSDs, or even better, NVMe storage for larger deployments.
Choosing Your Deployment Environment
Once you've figured out your resource requirements, the next decision is where Jira will actually live. Each option comes with its own set of trade-offs in terms of performance, flexibility, and operational overhead.
- Virtual Machines (VMs): This is the go-to, balanced approach for most organisations. VMs offer great isolation, making it easy to manage resources, take snapshots for backups, and migrate servers if you ever need to. Platforms like VMware or Hyper-V are the industry standard here.
- Bare-Metal Servers: If you need every last drop of performance, nothing beats dedicated hardware. You get direct access to all the server's resources without the slight overhead of a hypervisor. The downside? It's less flexible and usually comes with a higher upfront cost.
- Containers (Docker): This is the modern, more agile way to do it. Atlassian provides official Docker images that streamline the entire setup process and guarantee a consistent environment every time. Using Docker is a fantastic choice for teams who have embraced DevOps practices, as it makes scaling and upgrades much simpler, especially when managed with an orchestrator like Kubernetes.
For most teams just starting their self-hosting journey, a well-provisioned Virtual Machine offers the best blend of performance, flexibility, and manageable complexity. It’s a solid, scalable foundation that won’t lock you in.
Database and Network Configuration
Your Jira instance is only as stable as the database it relies on. While Jira supports a few different databases, PostgreSQL is the overwhelming favourite in the community for its rock-solid stability, excellent performance, and lack of licensing costs. Before you start the installation, you'll need to create a dedicated database and a user account for Jira with the correct permissions. Critically, make sure the database is configured to use UTF-8 character encoding to avoid a world of pain later.
Finally, let's talk networking. You need to make sure users can get to Jira while keeping the server secure. This means getting your firewall rules right. You’ll need to open the standard web ports—typically 80 for HTTP and 443 for HTTPS—to allow traffic from your users.
Behind the scenes, Jira’s internal application server (Tomcat) runs on port 8080 by default. While your users will never connect to this directly (that's what a reverse proxy is for), your firewall must allow traffic on this port between your reverse proxy and the Jira server. Clear communication between your systems administrator and your network team here is vital to avoid frustrating connection issues during setup.
Bringing Your Jira Instance to Life: Installation and Configuration
With the groundwork laid, it's time to actually get Jira up and running. This is where we shift from planning the infrastructure to executing the installation. We'll walk through the setup wizard, configure the crucial database connection, and handle the final tweaks that transform a fresh install into a platform your team can start using right away.
The whole process boils down to running the installer, telling Jira where to find its database, and then polishing the rest of the settings in your web browser. Getting these steps right from the outset will save you from a lot of common headaches down the road.
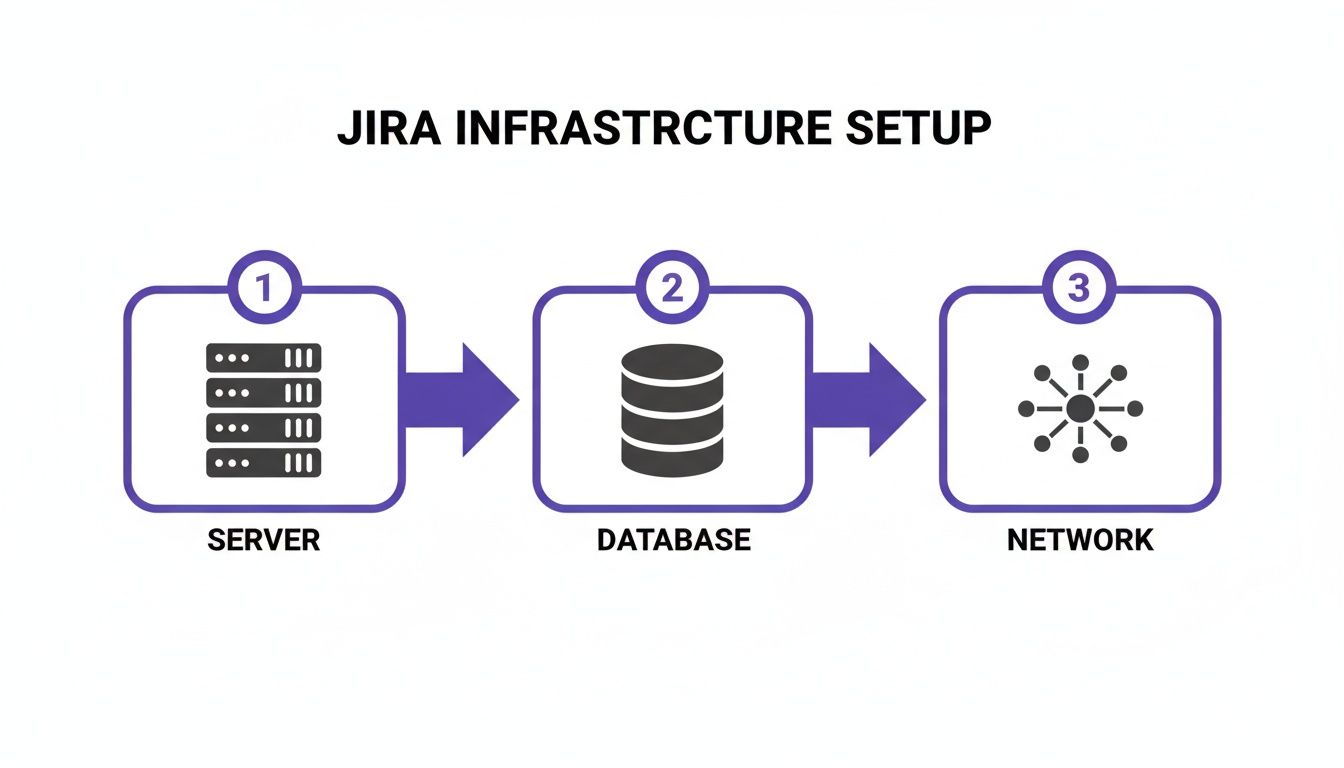
As this shows, your server, database, and network are the three pillars of a successful setup. They need to work together perfectly from day one.
Kicking Off the Setup Wizard
Whether you've used the binary installer or fired up a Docker container, your first real interaction with Jira happens in your web browser. Once the initial application files are in place and the service starts, you’ll need to navigate to its default port, which is almost always 8080.
The first screen you’ll see presents a choice. For most new deployments, you'll want to select "Set it up for me." This guided path is the most straightforward option, as the wizard takes care of creating the essential configuration files that link Jira to its database and other components.
Connecting to Your Database
This is probably the most critical configuration you'll make. Get this wrong, and nothing else works. The wizard will prompt you for the connection details of the PostgreSQL database you prepared earlier.
Make sure you have this information handy:
- Database Type: You'll pick PostgreSQL from the list.
- Hostname: The address of your database server.
- Port: The standard port for PostgreSQL is 5432.
- Database Name: The specific database you created for Jira.
- Username and Password: The credentials for the dedicated Jira user you set up.
Before you go any further, hit the "Test Connection" button. I can't stress this enough. That one click confirms your firewall rules are correct, the credentials are valid, and Jira can actually talk to its database. It’s a simple check that can prevent a ton of troubleshooting later.
A rookie mistake I see all the time is using the
postgressuperuser account. Don't do it. Always create a dedicated, non-superuser role just for Jira. It’s a basic security practice that contains the blast radius if the application's credentials are ever compromised.
Finalising the Initial Setup
Once Jira confirms it can connect to the database, you're on the home stretch. The wizard will walk you through a few final settings that define your instance's identity.
You'll need to provide:
- Application Title: This is what everyone sees in their browser tab and on the dashboard (e.g., "ACME Corp Jira").
- Mode: For any internal company use, you’ll want to select private. This restricts access to logged-in users.
- Base URL: This is the official address your users will use, like
https://jira.yourcompany.com. It’s vital to set this to the final, user-facing URL, even if you’re using a reverse proxy. Getting this right ensures that links in notifications and integrations work correctly.
After you submit these details, Jira will start building its database schema. This can take a few minutes, so be patient. It's busy creating all the tables needed to store your projects, issues, and workflows.
First Steps After Installation
You're almost there! Once the core installation is done, the wizard will ask you to apply your Jira Data Center licence. If you're just testing the waters, you can get a free 30-day evaluation licence directly from the Atlassian website.
Next up, you’ll create the first administrator account. This user has the keys to the kingdom, so pick a strong, unique password.
The last essential step is configuring your outgoing mail server. Without this, Jira is silent—no notifications for issue updates, no password resets, nothing. Head over to System > Outgoing Mail and plug in your company's SMTP server details. Send a quick test email to confirm it's working, and that's it. Your Jira instance is now officially open for business.
Hardening Your Self-Hosted Jira Instance
A fresh Jira installation works, but it’s far from secure. Your self-hosted instance is a goldmine of valuable information, holding everything from product roadmaps to sensitive security vulnerabilities, making it a tempting target. Hardening isn't just a final checkbox; it’s a foundational process of layering multiple security controls to shield your data from both external threats and internal misuse.
We'll start from the outside in, moving from the network perimeter to the application itself. This isn't about a generic security checklist, but about putting practical, battle-tested defences in place to transform your Jira instance into a fortified, enterprise-ready platform.
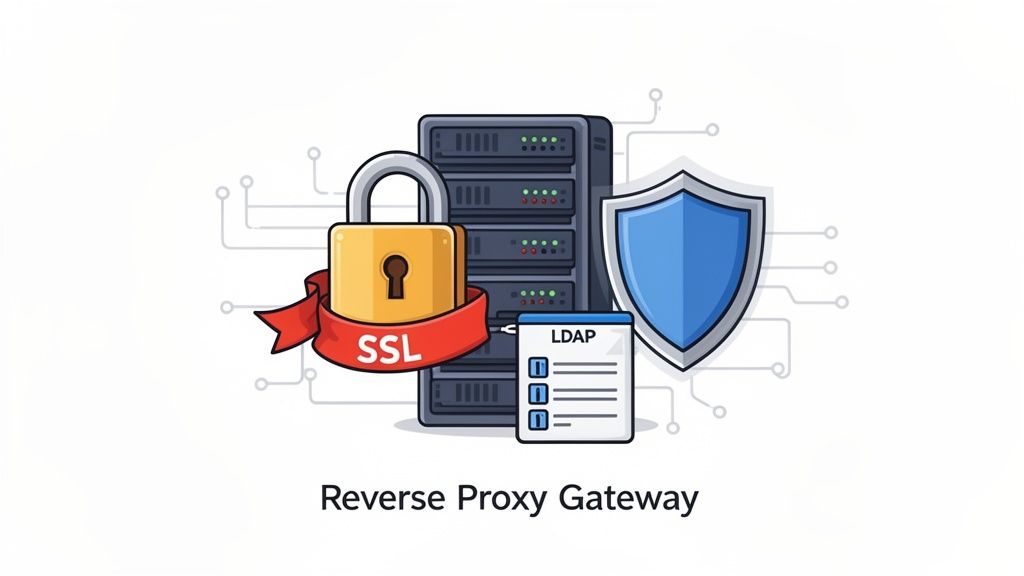
Securing Traffic with a Reverse Proxy and SSL
The absolute first line of defence is encrypting all traffic flowing to and from your Jira server. Never, ever expose Jira's built-in Tomcat server directly to the internet—it's a massive security risk. Instead, it must sit behind a reverse proxy.
Think of a reverse proxy, usually handled by a web server like Nginx or Apache, as a gatekeeper. It fields all incoming user requests, passes them securely to the Jira application, and then returns the response. From my experience, this setup is non-negotiable for several reasons:
- SSL/TLS Termination: The proxy handles the heavy lifting of encrypting and decrypting HTTPS traffic, taking that computational load off Jira itself.
- Centralised Management: It gives you a single, convenient point to manage security headers, access rules, and web traffic logs.
- Load Balancing: In a multi-node Data Center environment, the reverse proxy is what distributes traffic evenly across all your Jira nodes.
Setting up SSL with a proper certificate from an authority like Let's Encrypt ensures all data in transit—logins, issue details, attachments—is completely unreadable to anyone snooping on your network.
By forcing every connection over HTTPS, you shut the door on session hijacking and man-in-the-middle attacks. If you do only one thing to secure your instance, make it this. It is the single most effective security measure you can implement.
Centralising Identity with LDAP Integration
Managing user accounts directly inside Jira is a recipe for chaos, especially as your organisation grows. Every new hire, departure, and role change becomes a manual task, creating a huge administrative headache and raising the risk of forgotten, orphaned accounts.
The solution is to integrate Jira with a centralised directory service like Microsoft Active Directory (AD) or another LDAP-compliant system. This makes your existing directory the single source of truth for all user identities.
The benefits here are immediate:
- Streamlined User Provisioning: New users added to your directory can get Jira access automatically. More importantly, when an employee leaves, their account is instantly disabled.
- Consistent Credentials: People log in with the same username and password they use everywhere else. This cuts down on password fatigue and the temptation to use weak, recycled passwords.
- Group-Based Permissions: You can map existing directory groups (e.g., "Developers," "QA Team") straight to Jira roles, which radically simplifies permission management at scale.
This centralisation isn't just about better security; it also makes life much easier for your users.
Applying Application-Level Best Practices
Beyond the network and identity layers, you still need to lock down the Jira application itself. This boils down to diligent permission management and configuring built-in security features. A classic mistake is giving users permissions that are far too broad, which can easily lead to accidental data deletion or people seeing projects they shouldn't.
Always, always follow the principle of least privilege. Give users the absolute minimum access they need to do their jobs, and no more. Make it a regular habit to audit your project roles and permission schemes to make sure they're still fit for purpose.
For many German organisations, the choice to self-host is often about data sovereignty. While Atlassian now offers a German data residency option for its cloud products, it's important to know that some metadata might still be stored in other regions. Atlassian’s own documentation clarifies that while your core app data is pinned to Germany, certain platform data could live elsewhere. This distinction is precisely why many regulated businesses stick with self-hosting for complete data control. You can dig into the specifics of Atlassian's data residency policies for the full picture.
Ultimately, robust security is an ongoing process. By combining a hardened reverse proxy, centralised authentication, and disciplined in-app permissions, you’ll build a genuinely strong security posture for your self-hosted Jira environment.
Keeping Your Jira Instance Healthy: Maintenance And Upgrades
Getting your Jira instance up and running is a huge accomplishment, but it's really just the beginning of the journey. A self-hosted environment isn't something you can just set and forget; it’s a living system that needs regular care to stay stable, secure, and snappy. If you let maintenance slide, you'll quickly find that your team's most valuable tool has become their biggest source of frustration.
This section is all about the long-term health of your Jira setup. We'll walk through the three pillars of a well-run instance: solid backups, smart monitoring, and safe, predictable upgrades. Getting these right is how you make sure your investment in self-hosting pays off for years to come.
Building A Bulletproof Backup And Recovery Strategy
Let's be clear: your Jira data is priceless. A good backup plan isn't just a "nice-to-have"—it's the only thing standing between you and a disaster, whether that's a hard drive failure, a corrupted file, or just simple human error.
A complete Jira backup has two equally critical parts. The key is to back them up at the same time. If your database backup is from midnight but your file system backup is from noon the next day, you're setting yourself up for a painful—and likely failed—recovery attempt.
Here’s what you need to grab for a complete snapshot:
- The Database: This is the heart and soul of your Jira instance. It holds every issue, workflow, and project configuration. You'll want to use your database's own tools, like
pg_dumpfor PostgreSQL, to get a full dump. - The Jira Home Directory: This is where all your attachments, plugins, and indexes live. Without it, a restore is incomplete and pretty much useless.
For most organisations, a daily backup is the absolute minimum. If your instance is humming with activity all day, you might even want to back up the database more often. And please, always store your backups somewhere else—a different server, a different data centre, anywhere but on the same machine as your live instance.
Proactive Performance Monitoring
The worst time to find out Jira is slow is when a user complains about it. A much better approach is to watch key health metrics so you can spot trouble long before it affects anyone's productivity. This lets you fix bottlenecks and resource shortages during a planned maintenance window, not in a panic during the middle of the workday.
You don't need to monitor everything, just focus on the vitals:
Key Monitoring Metrics | Category | Metric to Watch | Why It Matters | | :--- | :--- | :--- | | Application | JVM Memory Usage | If this stays high, you could have a memory leak or just an underpowered server. Both lead to slowdowns and crashes. | | Database | Active Connections | A sudden jump in connections often points to a rogue plugin or a misbehaving script that's hammering the database. | | System | CPU Utilisation | Constantly maxed-out CPU is a classic sign your server can't keep up with the user load or a background process has gone haywire. | | System | Disk I/O & Space | Slow disk performance means a sluggish Jira experience, period. And running out of disk space will bring the whole thing to a grinding halt. |
Tools like Prometheus paired with Grafana, or all-in-one platforms like Datadog, are perfect for this. The real pro move is to set up alerts that fire when these numbers cross a certain threshold. That’s the hallmark of a well-managed system.
Executing Upgrades With Confidence
Upgrades are a necessary part of life. They give you access to new features and, more importantly, essential security patches. But just running an installer on a live production system and hoping for the best is a recipe for disaster. A bit of structure and planning can take all the fear out of the process.
The golden rule is simple: never upgrade your production instance directly. The only safe way to handle an upgrade is to run through the entire process on a staging environment first. This server should be as close a copy of your production setup as you can possibly get.
Here’s a tried-and-true path to a successful upgrade:
- Do Your Homework: Before you download anything, read the release notes for the new version. Look specifically for breaking changes, new system requirements, or any specific steps you need to take before you start.
- Test in Staging: Clone your production data over to your staging server. Do the full upgrade there. Once it's done, do some serious testing. Ask a few key users to run through their most important workflows to make sure everything still works as they expect.
- Schedule It: Plan the real upgrade for a time when traffic is low, like over a weekend or late at night. Make sure you communicate the maintenance window to all your users well in advance.
- Go Live (and Verify): Take one last backup of production right before you start. Run the upgrade. As soon as it's finished, do a quick "smoke test" to check that all the core features are working before you give everyone the green light.
Answering Your Questions About Self-Hosting Jira
Deciding to self-host Jira is a big move, and it's smart to have questions. It’s a serious commitment of time, money, and expertise. Before you jump in, you need to know exactly what you’re signing up for.
I've put together answers to the most common questions I hear from teams weighing their options or just starting their self-hosting journey. Think of this as a straightforward FAQ from someone who's been in the trenches.
What Is The Difference Between Jira Data Center And Jira Server?
This is, without a doubt, the number one point of confusion. Let's clear it up.
While both were self-hosted, Jira Server was officially discontinued for new sales back in early 2021, and Atlassian pulled the plug on all support in February 2024. If you're looking to self-host Jira today, your only supported path is Jira Data Center.
But this isn't just about a name change. Jira Server was built for a single machine. It worked, but it was a single point of failure. Jira Data Center, on the other hand, is designed for the big leagues—think enterprise-level performance and high availability. It runs in an active-active cluster, meaning you have multiple servers (nodes) sharing the load. If one node goes down, the others just pick up the slack, and your users never even notice. No more panic-inducing downtime.
In short, Jira Server is a thing of the past. For any new self-hosted setup, the conversation begins and ends with Jira Data Center. It's the modern, supported, and scalable solution for any organisation that needs to run Jira on its own metal.
How Hard Is Migrating From Jira Cloud To Data Center?
I won't sugarcoat it: migrating from Jira Cloud to Data Center is a major undertaking. It's a whole different beast compared to going the other way. Atlassian gives you some tools to help, but don't expect a simple "click-and-migrate" experience.
The process involves pulling a complete data export from your Cloud instance, building an entire Data Center environment from the ground up, importing all that data, and then testing absolutely everything to make sure it all came across correctly.
The real headache? Apps. Many fantastic apps on the Atlassian Marketplace for Cloud either don't have a Data Center version, or their data simply can't be moved over automatically. This means you’re often left hunting for alternatives or facing a painful manual data migration for each critical app. A full test migration to a staging environment isn't just a good idea—it's non-negotiable. It's the only way you'll uncover these landmines before you go live.
Is It A Good Idea To Use Docker For Self-Hosting Jira?
Yes, a thousand times yes. Using Docker to deploy Jira Data Center isn't just a good idea anymore; it's a best practice, and Atlassian even provides official Docker images on Docker Hub to make it easier.
Running Jira in containers gives you some massive advantages:
- Consistency: The environment is identical everywhere—development, staging, and production. This kills those frustrating "but it works on my machine" issues for good.
- Simplified Upgrades: An upgrade can be as simple as pointing to a new image tag and redeploying the container. It's vastly faster and safer than the old way of doing things manually.
- Scalability: When you're running a full cluster, containers are a perfect match for orchestrators like Kubernetes. Managing and scaling your nodes becomes much, much easier.
If your team is already comfortable with containerisation and DevOps practices, this is absolutely the way to go.
What Are The Real Costs Of Self-Hosting Jira?
The Jira Data Center licence fee you see on the website is just the beginning. The real number you need to focus on is the Total Cost of Ownership (TCO). Ignoring the hidden costs is a classic mistake that can wreck your budget.
When you're crunching the numbers, your TCO spreadsheet must include more than just the Atlassian bill:
- Infrastructure Costs: This is the hardware itself or the cloud compute resources (like AWS EC2 instances), plus storage, and networking gear. It all adds up.
- Operational Labour: You need a skilled sysadmin to keep the lights on—managing, patching, securing, and upgrading the entire stack. This isn't a side gig; a healthy Jira instance demands real, dedicated expertise.
- Marketplace Apps: Most teams need apps to make Jira do what they want. Nearly every app has its own Data Center licence fee, separate from Jira's.
- Backup and Monitoring Tools: The software and systems you'll need for proper backups and performance monitoring also have price tags.
When you compare self-hosting to Jira Cloud, a full TCO analysis is the only way to get a true apples-to-apples picture. Do the maths upfront—it's the only way to make a smart financial decision.
At Acquispect, we believe in building systems based on verifiable proof, not just claims. Our platform is designed to create a true meritocracy where your skills and work speak for themselves. Discover how we're building the trust layer for the digital economy. Learn more at https://acquispect.com.