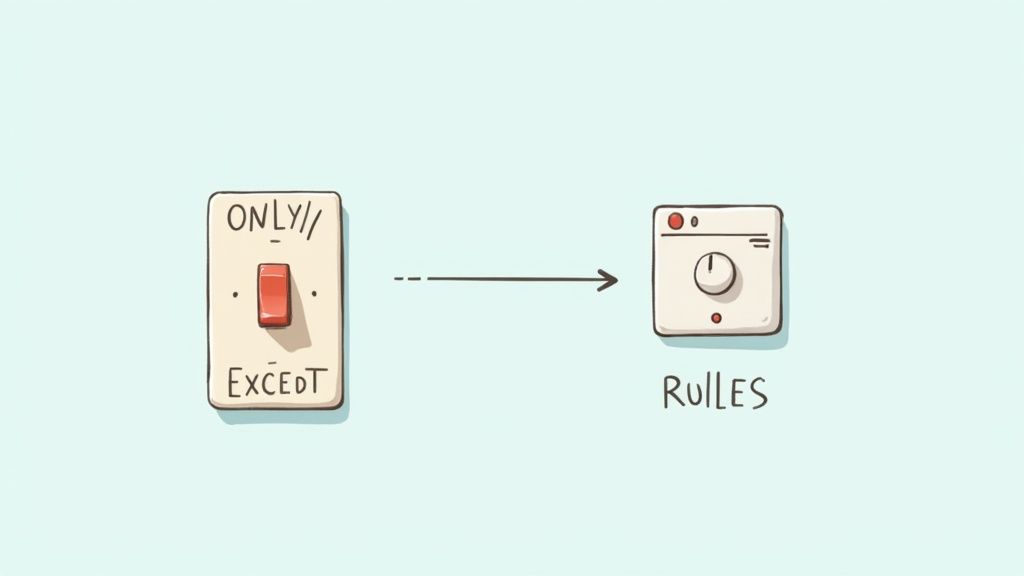
Before GitLab CI rules came along, we were all stuck using only and except to manage when our jobs should run. It worked, for a time, but as pipelines became more sophisticated, this older approach often led to tangled, brittle, and downright confusing configurations. GitLab then introduced the rules keyword, a much more powerful and flexible way to solve these headaches for good.
From only/except to a Smarter Way of Working
If you’ve been working with GitLab CI/CD for a while, you probably remember the mental gymnastics required to make only and except do what you wanted. It felt a bit like trying to wire a house with only a handful of on/off switches. Sure, you could get the lights to turn on for certain branches or turn off for others, but any kind of nuanced logic quickly became a mess.
The Headaches of Legacy Pipelines
The old only/except system forced developers into some pretty awkward corners. For example, what if you wanted a job to run for merge requests and for commits to the main branch, but never for any other branches? Achieving that simple goal could lead to some convoluted YAML that was a nightmare to read and even worse to debug.
This old way of doing things had some serious limitations:
- Clumsy Logic: You couldn't just say "run this job if condition A AND condition B are true." Combining conditions was a real pain and often didn't work as you’d expect.
- Implicit Behaviour: The logic was a strange mix of inclusions (
only) and exclusions (except). You often had to guess what would happen, which led to jobs running when they shouldn't or being skipped entirely. - Poor Readability: As pipelines grew, the
only/exceptsections would become bloated and almost unreadable, making it tough for new team members to get up to speed.
To put it plainly, rules bring clarity where only/except created confusion. Here’s a quick breakdown of why the new syntax is a game-changer.
Key Differences Between only/except and rules
| Feature | only/except (Legacy) | rules (Modern) |
| :--- | :--- | :--- |
| Logic Evaluation | Combines only and except with complex implicit "AND" logic. | Evaluates a list of rules in order; the first match determines the outcome. |
| Multiple Conditions | Difficult to combine. You can't easily express complex AND/OR logic. | Simple to combine conditions within a single rule using && and ||. |
| Clarity | Often ambiguous. The job's behaviour isn't immediately obvious. | Explicit and easy to read. You know exactly why a job will or won't run. |
| Advanced Control | Limited. Can't add jobs to pipelines dynamically after creation. | Can use workflow:rules to control the entire pipeline's creation. |
| Variables | Cannot set job-level variables based on conditions. | Can define variables inside a rule, which are applied only when the rule matches. |
The move to rules wasn't just a minor syntax update; it was a complete overhaul designed to make our lives easier.
The Rise of GitLab CI Rules
Recognising these pain points, GitLab introduced the rules keyword, fundamentally changing how we define pipeline logic. Think of it as upgrading from those basic light switches to a fully programmable smart-home panel. With rules, you define a clear, ordered list of conditions.
Each rule in the list is checked one by one, and the very first one that matches decides what happens to the job. This "first match wins" model gets rid of all the ambiguity and makes your pipeline’s behaviour completely predictable. It empowers you to build incredibly sophisticated workflows with simple, clear statements, finally solving the problems that only/except just couldn't handle.
Understanding the Building Blocks of GitLab CI Rules
Think of rules as the instruction manual for your pipeline. It’s a set of simple, powerful commands that tell your jobs exactly when to run, what to do, and how to behave. Once you get the hang of a few key components, you'll be able to build incredibly smart and efficient workflows. Let's break down the essential pieces you'll be working with every day.
The whole system starts with the if clause. This is your primary decision-maker, the bouncer at the door of your job. It checks if a certain condition is true, usually by comparing a GitLab CI/CD variable against a value you provide.
For example, a simple if can check if the code is being pushed to your main branch (if: $CI_COMMIT_BRANCH == "main") or if the pipeline was started for a merge request (if: $CI_PIPELINE_SOURCE == "merge_request_event"). This basic conditional check is the foundation for everything that follows.
Defining the Action with when
Okay, so an if condition has been met. Now what? You need to tell GitLab what to do next, and that’s the job of the when keyword. It dictates how and when the job should actually run.
You have a few options here:
on_success: This is the default setting. The job kicks off as soon as the previous stage finishes without any errors.manual: This one is crucial. The job appears in the pipeline, but it won’t run on its own. Someone has to physically click the "play" button in the GitLab UI to get it going. It’s perfect for things you don't want to happen accidentally, like deploying to production.delayed: This tells the job to wait for a specific amount of time before starting. For instance, you could usestart_in: 30 minutesto pause a job for half an hour after it’s been triggered.never: A handy way to explicitly stop a job from ever running if a certain condition is met. It’s a clear and direct way to create an exception.
Let’s look at a quick example putting if and when together:
deploy_to_staging: stage: deploy script: - echo "Deploying to staging environment..." rules: - if: $CI_COMMIT_BRANCH == "develop" when: on_success
This little snippet tells GitLab one simple thing: automatically run the deploy_to_staging job every time new code is pushed to the develop branch.
Handling Non-Critical Jobs with allow_failure
Some jobs are nice to have but aren't mission-critical. Maybe you have a job that generates optional documentation or sends a notification to a Slack channel. If that job fails, you certainly don't want it to bring your entire deployment process to a screeching halt.
The
allow_failurekeyword is your safety net. By settingallow_failure: trueinside a rule, you're telling GitLab, "Hey, if this particular job fails, don't worry about it. Let the rest of the pipeline proceed and still mark the whole thing as a success."
This is a fantastic feature for keeping things moving, especially when your pipelines have lots of peripheral tasks that shouldn't be showstoppers.
Targeting Specific File Changes with changes
Now for one of the most powerful features in the rules toolkit: the changes keyword. This is an absolute game-changer for monorepos, where you might have multiple, independent projects all living in the same repository. It lets you run a job only when specific files or folders have been touched.
Imagine your repository has a frontend app in a /frontend directory and a backend service in /api. With changes, you can set up a job that runs your frontend tests only when something inside the /frontend folder has actually been modified. No more wasted CI minutes running irrelevant tests!
test_frontend_app: stage: test script: - cd frontend/ - npm install - npm test rules: - if: $CI_PIPELINE_SOURCE == "merge_request_event" changes: - frontend/**/*
This kind of efficiency is exactly what organisations like the European Space Agency (ESA), a major player in Germany's tech scene, have embraced. After moving to GitLab in late 2017, they used rules-based pipelines to unify workflows across more than 40 projects. By triggering jobs based on file changes and branch names, they automated a process that now handles over 60,000 jobs and cut deployment cycles from weeks down to mere minutes. You can read more about how ESA modernised its CI/CD process.
By getting comfortable with these building blocks—if, when, allow_failure, and changes—you gain fine-grained control over your pipelines, making them faster, smarter, and far more efficient.
How GitLab Decides Which Rule to Follow
When you start adding multiple rules to a single job, a crucial question comes up: how does GitLab pick which one to use? The good news is that the logic is straightforward. GitLab evaluates your rules in the order you write them, from top to bottom, and stops the second it finds a match.
Think of it as a bouncer checking a guest list. The bouncer starts at the top and works their way down. The moment they find your name, they let you in and stop checking. They don't care if your name appears again further down the list. This first-match-wins principle is the most important concept to understand for building predictable pipelines with rules.
This decision tree gives you a clear picture of the process.
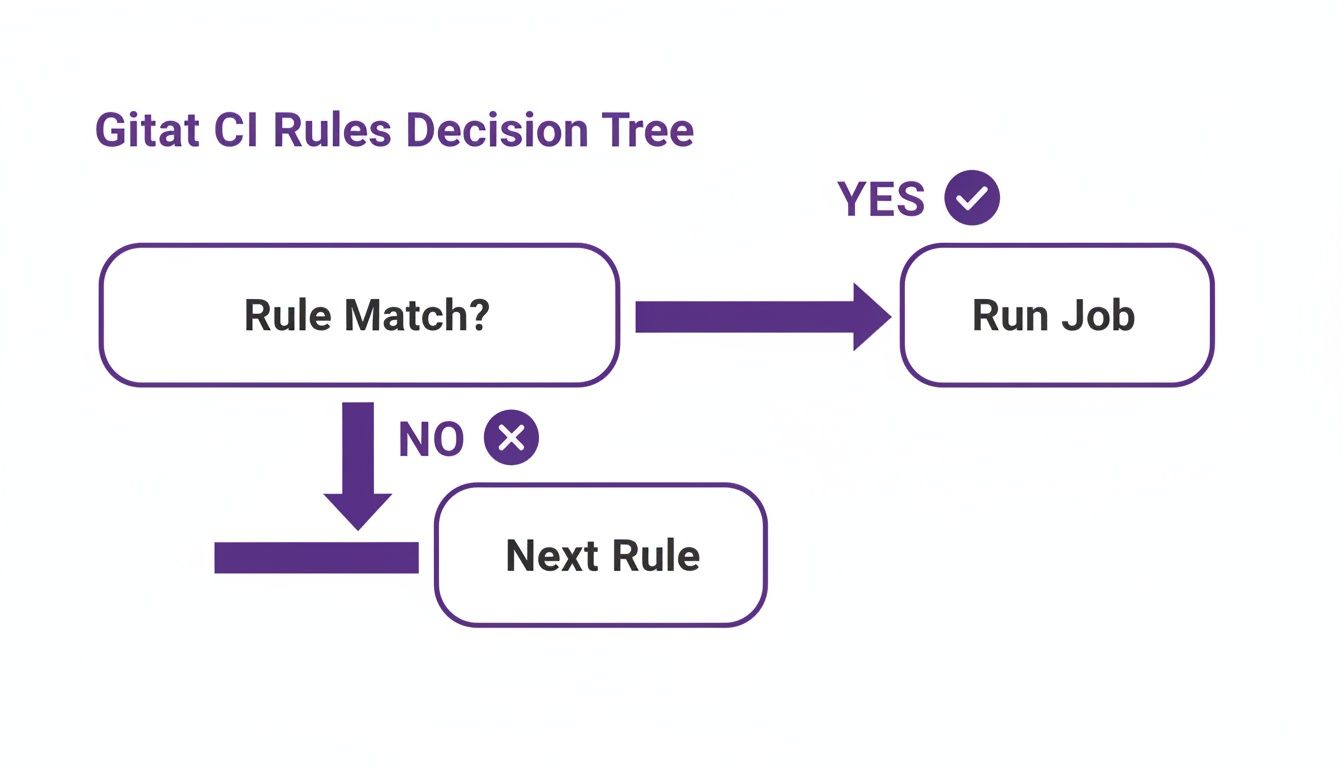
As you can see, for each rule, GitLab asks a simple question: "Does this rule's condition match the current situation?" If the answer is yes, the job gets added to the pipeline, and the evaluation for that job is done. If not, it just moves on to the next rule in your list.
The Importance of Rule Order
Because GitLab stops at the very first match, the order of your rules is everything. It's not just a matter of style; it directly dictates how your pipeline behaves. If you put a broad, general rule before a highly specific one, the specific rule might never even get a look-in.
Let's say you want a deployment job to run manually on the main branch, but automatically on every other feature branch.
Here’s an example of how not to do it:
deploy_job: rules: - if: $CI_COMMIT_BRANCH # Rule 1: This is too general! It matches any branch. when: on_success - if: $CI_COMMIT_BRANCH == "main" # Rule 2: This is more specific for 'main'. when: manual
When a commit lands on the main branch, it perfectly matches the first rule (since $CI_COMMIT_BRANCH exists). The job gets scheduled to run automatically, and GitLab immediately stops processing. The second, more specific rule that would have made the job manual is completely ignored.
The takeaway here is simple but absolutely vital: always put your most specific rules first. Your general, catch-all rules should always come last. This ensures your special cases are handled correctly before the broader conditions take over.
What Happens If No Rules Match?
So, what if a pipeline runs and none of your rules for a job match the situation? Again, the logic is simple and clean. If GitLab gets to the end of your list without finding a match, the job is not added to the pipeline. It simply doesn't exist for that particular run.
This is a huge advantage over the older only/except system, which could sometimes be ambiguous. With rules, you have to be explicit. There's no hidden default action; if you don't write a rule that tells a job to run, it won't. This makes your pipeline configuration far more predictable and much easier to debug when things don't go as planned.
Putting Rules into Practice with Real-World Scenarios

Knowing the theory is one thing, but the real magic happens when you start using rules to solve the CI/CD puzzles you face every day. So, let’s move from abstract concepts to some concrete, battle-tested recipes you can lift directly for your own projects. These examples show just how you can build smarter, more efficient pipelines for common development workflows.
We'll walk through some complete, copy-and-paste-ready snippets for situations you’re almost guaranteed to run into. Think of these as starting points that show how a few well-placed lines of YAML can bring real elegance and clarity to complex pipeline logic.
Running Jobs Only for Merge Requests
One of the most common needs is running a suite of tests or code quality checks only when a merge request is opened or updated. Why? It stops your runners from firing up for every single commit on a feature branch, which is a massive waste of resources. The trick here is the pre-defined $CI_PIPELINE_SOURCE variable.
Here’s a dead-simple recipe for a linting job:
code_quality_check: stage: test script: - echo "Running linter..." rules: - if: $CI_PIPELINE_SOURCE == 'merge_request_event'
With this rule in place, the code_quality_check job will only get added to pipelines that are triggered by a merge request. For any regular branch push, the job won’t even show up. Your pipeline stays clean, focused, and fast.
Triggering Deployments Based on Branch Names
Automating deployments to different environments based on the branch name is another absolute classic. You’ll often want commits to your develop branch to land on a staging server automatically, while anything going into main should probably have a manual gate before it hits production.
This strategy gives you the best of both worlds: speedy, automated feedback for development and a crucial safety check for your live environment.
Key Takeaway: Combining
ifconditions with thewhen: manualkeyword is the perfect way to balance automated workflows for pre-production with deliberate, human-gated actions for production.
Let's see what that looks like in code:
deploy_staging: stage: deploy script: - echo "Deploying to Staging..." rules: - if: $CI_COMMIT_BRANCH == 'develop'
deploy_production: stage: deploy script: - echo "Deploying to Production..." rules: - if: $CI_COMMIT_BRANCH == 'main' when: manual
In this setup, deploy_staging kicks off automatically every time code is pushed to develop. On the other hand, deploy_production is only created for pushes to main, and it waits for a team member to manually click the "play" button in the GitLab UI. No more accidental production deployments.
This kind of granular control is a huge reason why GitLab is so popular. In Germany's DevSecOps community, for example, GitLab CI commands a robust 40% market share among CI/CD tools. Its rise is fuelled by the power of its rules engine, which enables the automated security scanning and optimised workflows essential in the country’s €50 billion software sector. In fact, this type of rules-based automation has been shown to slash deployment times by up to 40% in regulated German firms. You can discover more insights about the state of CI/CD and its impact on the industry.
Creating an Efficient Monorepo Pipeline
Monorepos, where you keep multiple distinct projects in one repository, throw a unique spanner in the works. You definitely don’t want to test the entire codebase when only a tiny part of it has changed. This is exactly where the changes keyword becomes your best friend, letting you build hyper-optimised pipelines.
Imagine a repository with two applications: frontend-app and backend-service. We can set up our jobs to run only when files inside their own directories are touched.
test_frontend: stage: test script: - echo "Testing the frontend application..." rules: - if: $CI_PIPELINE_SOURCE == 'merge_request_event' changes: - frontend-app/**/*
test_backend: stage: test script: - echo "Testing the backend service..." rules: - if: $CI_PIPELINE_SOURCE == 'merge_request_event' changes: - backend-service/**/*
With these rules, a change to a file inside frontend-app will only trigger the test_frontend job. The test_backend job is completely ignored, which can dramatically cut down your pipeline execution time and resource usage. For any team working in a monorepo, this pattern is an absolute must-have.
Using 'workflow: rules' to Control Entire Pipelines
So far, we've been looking at the micro-level, using GitLab CI rules to control individual jobs. It's time to zoom out. What if you want to decide whether an entire pipeline should even start? This is where workflow: rules comes in, acting as the ultimate gatekeeper for your whole CI/CD process.
Think of job-level rules like the individual light switches in each room of a house. workflow: rules, on the other hand, is the main circuit breaker for the entire building. If it trips, none of the lights even get a chance to turn on, no matter what their individual switches are set to. This global control is your best tool for optimising resource usage and preventing completely pointless pipeline runs.
The Problem of Duplicate Pipelines
A classic and costly problem that workflow: rules solves beautifully is the duplicate pipeline issue. By default, GitLab often creates two pipelines for the exact same change: one when you push to a branch, and another when you open a merge request for that branch. This eats up valuable runner minutes and clutters your pipeline history.
With workflow: rules, you can set a clear policy to stop this. You can tell GitLab, "Only create pipelines for merge requests, scheduled events, or direct pushes to the main branch. Ignore everything else."
This approach has become a standard for efficient CI/CD. The adoption of such advanced features in GitLab has made a huge impact, particularly in Germany. Leading tech firms there show an 85% adoption rate for CI/CD pipelines, and GitLab's 40% market share is a testament to the power of its rules engine. This has helped drive a 39% adoption of industry cloud platforms across Europe, with German manufacturing giants expecting over 45% penetration by mid-2025. You can learn more about GitLab's strategic impact on DevSecOps.
Workflow Rules vs. Job Rules: A Clear Comparison
To really nail down the difference, let’s look at how you’d stop a job from running on a documentation change at both levels.
Job-Level rules (Micro Control)
A job-level rule stops a single job from running. The pipeline itself still kicks off, and every other job without this specific rule will run as usual.
deploy_app: stage: deploy script: - echo "Deploying..." rules: - if: $CI_COMMIT_BRANCH == "main" changes: - src/**/* # Only run if source code changes
In this case, if someone only changes the
README.mdfile, the pipeline still gets created. However, thedeploy_appjob will be skipped. All other jobs in the pipeline, liketestorbuild, would still run.
workflow: rules (Macro Control)
A workflow rule, in contrast, stops the entire pipeline from being created in the first place. If its conditions aren't met, nothing runs. At all.
workflow: rules: - if: $CI_PIPELINE_SOURCE == 'merge_request_event' - if: $CI_COMMIT_BRANCH == $CI_DEFAULT_BRANCH - if: $CI_COMMIT_TAG - if: $CI_PIPELINE_SOURCE == 'schedule' - when: never # A final rule to prevent all other pipelines
This configuration creates a strict, repository-wide policy. It makes sure pipelines are only created for the most important events, saving immense resources by preventing runs for every minor push to a feature branch. By mastering workflow: rules, you graduate from just managing jobs to orchestrating your entire CI/CD strategy with real precision and efficiency.
How to Troubleshoot Your GitLab CI Rules
We’ve all been there. You push a change, expecting your pipeline to spring to life, but… nothing. Or worse, a job you thought would be skipped starts running. When your .gitlab-ci.yml file feels like it's ignoring you, the problem usually isn't a bug in GitLab itself, but a subtle misunderstanding of how GitLab CI rules are evaluated. Let's walk through how to find and fix these common hiccups.
One of the most frequent traps is the "first-match-wins" behaviour. It’s easy to write a general, catch-all rule and place it at the top of your list. The problem is, GitLab stops checking as soon as it finds a match. This means any more specific rules you’ve listed after it will never even be seen. A good rule of thumb is to always order your rules from most specific to most general.
Pinpointing the Problem
Your first move should always be to double-check the conditions your rules rely on. CI/CD variables are the heart of your pipeline's logic, and it’s surprisingly easy to make a wrong assumption about their values. A tiny typo in a variable like $CI_COMMIT_BRANCH or a flawed comparison is often the root cause.
Here's a quick checklist for what to investigate:
- Incorrect Variable Values: Are you certain a variable has the value you expect? It might be empty or contain something else entirely.
- Typographical Errors: A simple spelling mistake in a variable name or a string you're comparing against is a classic culprit.
- Rule Order: Is a broad rule accidentally "shadowing" and blocking a more specific one that comes later in the list?
- Quotation Mismatches: Remember that single and double quotes handle variable expansion differently. Make sure you're using the right ones for the job.
Using Echo for Simple Debugging
One of the quickest ways to see what’s really going on is to make GitLab show you. Instead of guessing, create a temporary job whose only purpose is to print out the variables you're using in your conditions. This removes all the guesswork by revealing exactly what GitLab is working with when the pipeline runs.
A simple test job that just prints key variables can save you hours of head-scratching. It gives you a direct look into the pipeline's environment, letting you instantly confirm if your assumptions are correct before your rules are even evaluated.
Here’s a simple but incredibly effective debug job you can drop into your configuration. We’ll set it to run on every pipeline so you can always see what’s happening.
debug_variables: stage: .pre script: - echo "The value of CI_COMMIT_BRANCH is $CI_COMMIT_BRANCH" - echo "The value of CI_PIPELINE_SOURCE is $CI_PIPELINE_SOURCE" - echo "The value of CI_MERGE_REQUEST_TARGET_BRANCH_NAME is $CI_MERGE_REQUEST_TARGET_BRANCH_NAME" rules: - when: always # This ensures the job always runs for debugging purposes
Just add this job to your .gitlab-ci.yml, run the pipeline, and check the job’s log. The output will show you the exact, real-time values of these variables. Now you can compare that output directly against the if conditions in your other jobs and see exactly where things are going wrong.
Common Questions About GitLab CI Rules
As you get more comfortable with GitLab CI rules, you’re bound to run into a few tricky situations or have some head-scratching moments. It happens to everyone. Let's walk through some of the most common questions that pop up, with clear answers to get you unstuck and back to building great pipelines.
Can I Use 'rules' and 'only/except' Together in One Job?
In short, no. You have to pick one. Think of only/except as the old way of doing things and rules as the new, more powerful syntax. If you try to mix both in the same job definition, GitLab will give you a CI lint error right away.
The system is designed this way to keep the logic clean and prevent confusing, unpredictable behaviour. The best practice is to stick with rules for all your jobs—it’s more flexible and where all the future improvements are happening.
How Can I Make a Job Run on All Branches Except One?
This is a classic problem and a perfect example of where rules really shines. The trick is to think in layers: handle your exception first, then create a general rule for everything else.
Let's say you want a job to run on every single branch except the main branch. Here’s how you’d do it:
test-job: script: - echo "Running tests..." rules: - if: $CI_COMMIT_BRANCH == "main" when: never - when: on_success
See the logic? GitLab evaluates the rules from top to bottom. It first checks if the branch is main and, if so, immediately stops the job thanks to when: never. If that condition isn't met, it moves to the second rule, which acts as a simple "catch-all" and lets the job run.
What Is the Difference Between 'rules' and 'workflow: rules'?
This is a really important distinction to grasp. It's all about scope—are you controlling a single job, or the entire pipeline?
Job-level
rulesare for micro-management. They decide whether an individual job gets added to a pipeline that's already been approved to run.
workflow: rulesis the bouncer at the door. It decides whether the entire pipeline should even be created in the first place. If the conditions inworkflow: rulesaren't met, the pipeline is stopped before it even starts, and none of your jobs will ever be considered.
You'll use job rules for day-to-day task control. You'll use workflow: rules for high-level decisions, like preventing duplicate pipelines from running for both a branch push and its related merge request.
Is It Possible to Define Variables Inside a Rule?
Absolutely, and it’s a game-changer for creating dynamic jobs. You can add a variables block right inside a rule. Those variables will only come into existence if that specific rule is the one that triggers the job.
This lets you tweak a job's environment on the fly. For example, you could have a single deployment job that points to a different API_ENDPOINT depending on whether it was triggered by the develop branch or the main branch. It keeps your pipeline configuration much cleaner.
At Acquispect, we believe work is the only proof of work. We are building the trust layer for a new economy where your skills, not your CV, define your opportunities. Our platform uses AI to audit your code and cryptographically sign your achievements, creating a verifiable record of your excellence. Join us in building a true meritocracy at acquispect.com.