So, you've written some code and now you want to get it into the main project. How do you do that without breaking everything? That's where the pull request comes in.
A pull request isn't actually a command in Git itself. Instead, it's a feature you'll find on hosting platforms like GitHub, GitLab, or Bitbucket. It’s the formal, structured way of saying, "Hey team, I've finished my work. Can you take a look before we merge it?"
What Exactly Is a Git Pull Request?
The best way to think about a pull request is as a conversation starter for your code.
Imagine you're part of a team writing a book together. You wouldn't just sneak into the shared document and start adding a new chapter, right? You’d write your draft separately, then share it with your co-authors for feedback. They'd read it, leave comments, and maybe suggest a few tweaks to make sure it fits the story's tone and plot.
A pull request does precisely this for software development. It takes all the commits you've made on your separate feature branch and bundles them up into a neat package. This creates a dedicated space for your team to review and discuss the changes before they become a permanent part of the project.
The Core Purpose of a Pull Request
At its heart, a pull request is all about code review and quality control. When you open one, you're literally asking the project maintainers to "pull" your changes into another branch—usually the main development branch, often called main or master. This simple step is absolutely fundamental to how modern software teams work.
A pull request acts as a quality gatekeeper. It’s the mechanism that ensures every line of code is vetted by at least one other person before it becomes part of the official project, which is critical for maintaining a stable and reliable codebase.
This collaborative checkpoint brings a ton of benefits to the table:
- Improved Code Quality: A fresh pair of eyes can spot bugs, suggest a more efficient way to write a function, or point out a logical flaw you might have missed. It’s amazing what you don’t see when you’ve been staring at the same code for hours.
- Knowledge Sharing: The review process is a fantastic learning tool. Junior developers get direct feedback from more experienced team members, and seniors get a better understanding of what’s happening in different parts of the codebase.
- Maintaining Consistency: Reviewers act as guardians of the project's standards. They make sure your new code follows the established style guides and architectural patterns, which keeps the entire project feeling cohesive and easy to navigate.
- Automated Checks: This is a huge one. Opening a pull request is often the trigger for automated systems. These Continuous Integration (CI) pipelines can automatically run a full suite of tests, scan for security vulnerabilities, and confirm that your changes don't accidentally break something else.
The Anatomy of a Pull Request Workflow
Think of a pull request workflow as a well-defined roadmap for your code. It's not just about pushing changes; it's a structured process that guides every contribution from a simple idea to a fully integrated part of the project. This journey ensures every change is proposed clearly, reviewed by the team, and thoroughly tested before it ever touches the main codebase.
The whole cycle is built on a simple, powerful idea: propose, review, and merge. This isn't about creating barriers; it's about building quality and shared understanding from the ground up.
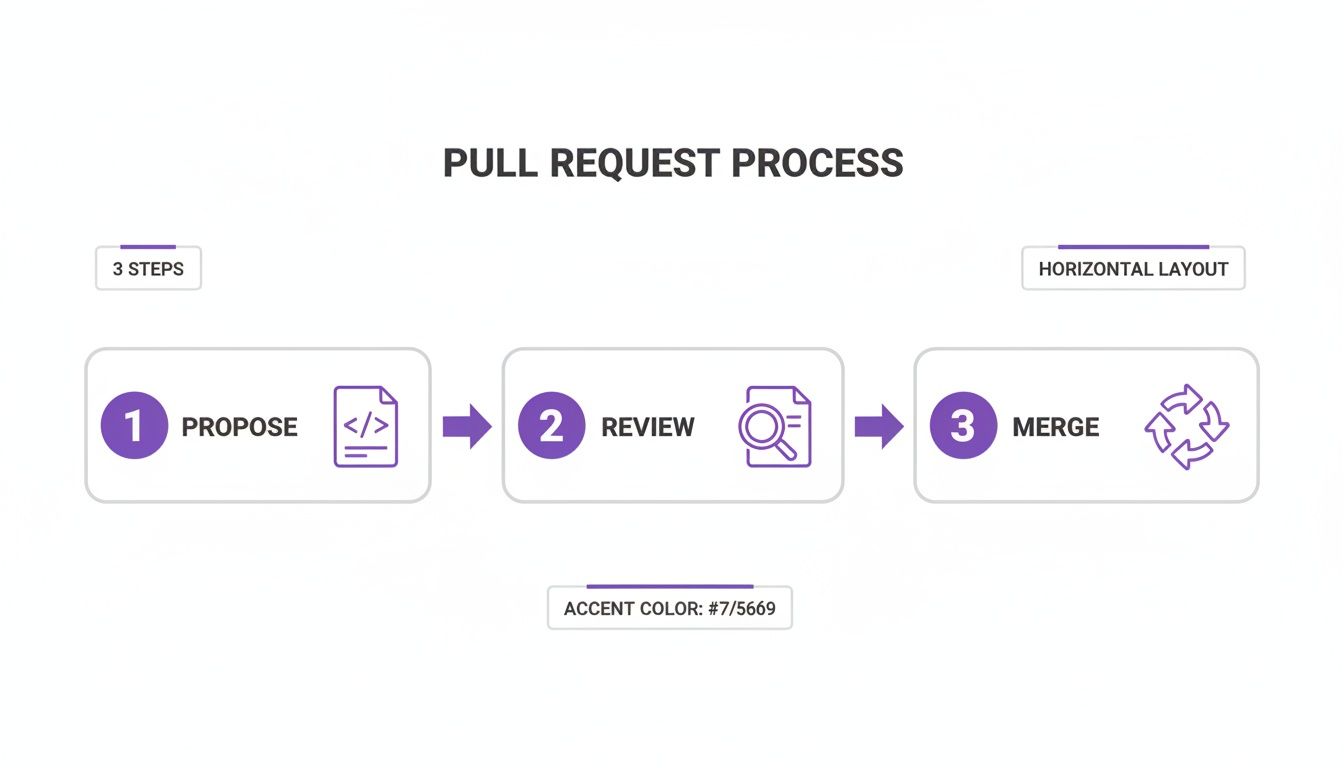
Following this workflow turns code integration from a potential mess into a transparent and deliberate process. Let's walk through each step of this journey.
Stage 1: Proposing Changes on a Branch
Everything starts in a safe, isolated workspace. The golden rule is to never work directly on the main branch (often called main or master). Instead, you create a new feature branch.
This branch is essentially your own personal copy of the project, frozen at a point in time. It gives you the freedom to experiment, build, and even break things without any risk to the stable, working version of the code. As you make progress, you'll save your work in small, logical steps called commits.
Here’s how it usually plays out:
- Create and switch to a new branch: This isolates your work. Good naming conventions really help here, like
feature/add-user-loginorbugfix/fix-homepage-typo. - Make your code changes: This is where you get down to business, writing the code for the new feature or squashing that pesky bug.
- Commit your changes: You'll stage your modified files and wrap them up in a commit with a clear message explaining what you did and why.
- Push your branch to the remote repository: This uploads your new branch and all its commits from your computer to the shared platform, like GitHub or GitLab.
Stage 2: Opening the Pull Request and Review
With your branch pushed, it's time to open the pull request. This is your formal proposal to the team, kicking off the collaborative review phase. The PR page itself becomes the command centre for all discussions, feedback, and automated checks related to your changes.
This is where your teammates jump in. They can leave comments on specific lines of code, ask clarifying questions, and suggest improvements. It's a dialogue, not a test, all aimed at polishing the code and making it the best it can be.
A pull request isn't just about getting an approval stamp; it's a critical knowledge-sharing mechanism. It helps distribute context across the team, ensuring more than one person understands how a specific part of the system works.
Automation also plays a huge role here. Continuous Integration (CI) pipelines will spring to life, automatically running tests to catch bugs, performance regressions, or style issues. Many teams also connect their development tools for a seamless workflow. In fact, learning how to integrate platforms like GitLab and Jira can keep your project management perfectly in sync with what's happening in the code.
Stage 3: Merging and Cleaning Up
Once the team has reviewed your work, all conversations are resolved, and every automated check has passed with flying colours, your pull request is ready to be merged. A project maintainer or senior developer will give the final approval and perform the merge.
This simple action takes all the commits from your feature branch and weaves them into the main branch. Just like that, your code is now an official part of the project.
With the merge complete, your feature branch has served its purpose. The final step is to delete it. This is good housekeeping—it keeps the repository tidy and prevents a build-up of old, inactive branches, making it far easier for everyone to navigate the project's history.
How to Create Your First Pull Request
Alright, enough theory. It’s time to roll up your sleeves and create your first pull request. This can feel a little intimidating at first, but it quickly becomes second nature. Whether you're a terminal wizard or prefer a more visual approach, the process is pretty straightforward.
We'll walk through both the command-line interface (CLI) and graphical user interface (GUI) methods. The goal here is to get you comfortable with the fundamental mechanics so you can contribute to any project with confidence.
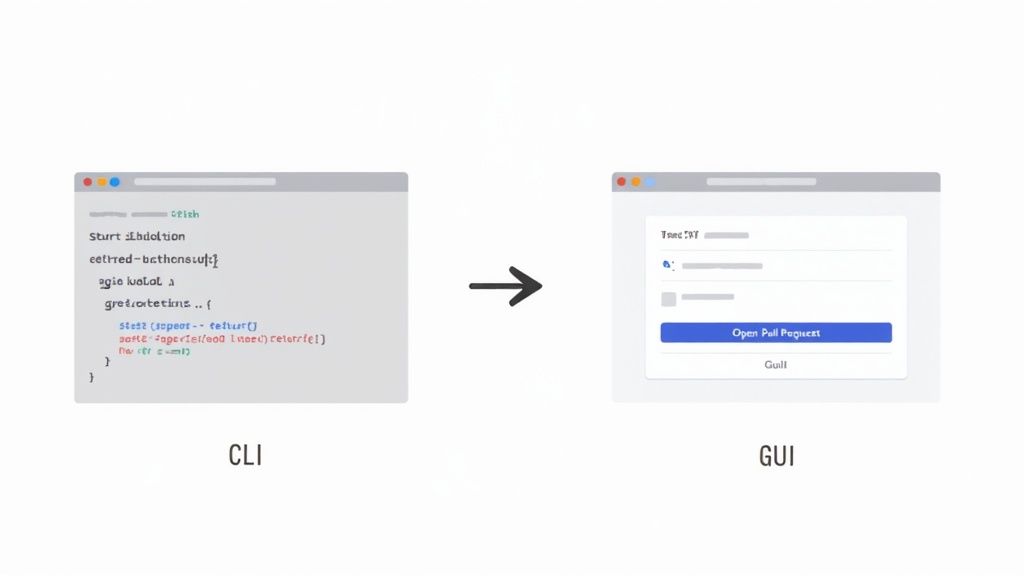
The Command Line Method
If you live in the terminal, you’ll be glad to know the pull request process starts right where you work. It’s really just a three-step dance: branch, commit, and push.
- Create and Switch to a New Branch: First things first, get your changes onto a new branch. Naming it clearly is a pro-move that your team will thank you for. git checkout -b feature/update-readme
- Make and Commit Your Changes: Now, do your work. Once you’ve updated the files (like
README.mdin this example), stage them and lock in your changes with a descriptive commit message. git add README.md git commit -m "Docs: Update installation instructions" - Push Your Branch: The final terminal step is to send your new branch and its commit up to the remote repository, which is usually called
origin. git push -u origin feature/update-readme Once that's done, your terminal will often give you a handy link to create the pull request directly on GitHub, GitLab, or whatever platform you're using. Just click it, and you’re halfway there.
The Graphical Interface Method
Not everyone loves the command line, and that's perfectly fine. Platforms like GitHub have made creating a pull request incredibly simple with just a few clicks. It's a great way to start if you're new to Git or just prefer a visual workflow.
After you push your branch (even from a desktop app), the hosting service is smart enough to see it.
- Go to Your Repository: Head over to the main page of your repository on the platform.
- Look for the "Compare & pull request" Button: You can't miss it. A prominent banner will pop up, asking if you want to create a PR from your new branch. Click that button.
- Fill Out the Details: This takes you to the "Open a pull request" page. Here, you just need to confirm that the base branch (where you want to merge, e.g.,
main) and your head branch (the one with your changes, e.g.,feature/update-readme) are correct.
Writing a clear and concise description for your pull request is not just a formality; it's a critical part of the review process. A well-written summary provides context, explains the "why" behind your changes, and guides reviewers, leading to faster and more effective feedback.
Writing a Great PR Description
No matter which method you used to get here, the final and most important step is writing the pull request itself. A weak description can stall your contribution, while a strong one gets it merged quickly.
Here's a simple but effective template:
- A Clear Title: Summarise your change in one line, like "Fix User Login Bug on Mobile."
- Context: Why did you make this change? Briefly explain the problem you’re solving or the feature you’re adding.
- Changes Made: Use a bulleted list to outline exactly what you did. This gives reviewers a quick checklist to follow.
- Testing: How did you verify your work? Describe the steps you took to ensure your changes work and don't break anything else.
For a deeper dive into documenting technical work, check out our Acquispect technical documentation. Mastering this skill will make you a much more effective developer.
Best Practices for Effective Pull Requests
Anyone can create a pull request; that’s just a few clicks. The real skill is crafting a PR that your team can review quickly and confidently. Let's move past the technical commands and talk about the habits that separate a frustrating code review from a fantastic one. This isn't just about code—it's about clear communication and building a team that ships better software, faster.
Nailing these practices means your work gets approved sooner, merges without headaches, and ultimately leads to a stronger codebase. It's a win for you, your reviewers, and the entire project.
Keep Pull Requests Small and Focused
If you take only one thing away from this guide, let it be this: keep your pull requests small. Nothing strikes fear into a reviewer’s heart like a PR that touches 20 files with thousands of lines of changes. They're nearly impossible to review thoroughly, hard to test, and practically invite bugs to sneak in undetected. It’s well-documented that a reviewer’s ability to spot errors plummets as the size of the change goes up.
Instead, think of each pull request as a single, self-contained unit of work. It should do one thing and do it well.
- Fix one specific bug.
- Add one new feature.
- Refactor one isolated component.
Taking this "atomic" approach makes your PRs a breeze to understand. A focused change with a clear goal can get reviewed and merged in minutes, not days. As a bonus, it drastically cuts down the time you'll spend wrestling with the dreaded merge conflicts that pop up when your branch drifts too far from the main line of development.
Write Crystal-Clear Titles and Descriptions
Your pull request is a conversation starter, and your title and description are the opening lines. A title like "Bug fix" is next to useless. A great title gets straight to the point, like "Feat: Add Password Reset Endpoint" or "Fix: Correct Calculation Error in User Invoicing". It gives everyone immediate context.
A well-crafted PR description is an investment. It saves your team valuable time by explaining the 'what' and the 'why' upfront, turning the review from an investigation into a simple verification.
The description is where you fill in the details. A solid PR description should always include:
- The 'Why': Why does this change exist? Link to the project management ticket or issue number (e.g., "Closes TICKET-123").
- The 'What': Give a brief summary of what you did. Bullet points are perfect for listing out the key changes.
- How to Test: Don't make your reviewer guess. Provide clear, step-by-step instructions on how they can check your work.
- Visuals: For any change that affects the user interface, screenshots or GIFs are essential. They communicate the impact of your work far better than words ever could.
Review Your Own Code First
Before you hit that "request review" button, do yourself—and your team—a favour: review your own PR first. Go through the "Files Changed" tab and read every single line as if you were someone else seeing it for the first time. You’ll be surprised by what you catch—a leftover debugging statement, a typo in a comment, or a much cleaner way to solve the problem.
This simple act of self-review is a massive sign of respect for your teammates' time. It lets them focus on the bigger picture—the logic, the architecture, the edge cases—instead of wasting energy pointing out small mistakes you could have easily fixed yourself. It’s a small step that makes a huge difference in the quality of your work.
Solving Common Pull Request Challenges
Even with a perfect workflow on paper, pull requests rarely travel in a straight line. Challenges pop up. That’s just a normal part of building things with a team. Knowing how to handle these bumps in the road is what separates a frustrating experience from a productive one.
Let's talk about the most common hurdle: the dreaded merge conflict. You’ve finished your feature, you’re ready to merge, but someone else has already merged changes into the main branch that touch the exact same lines of code. Now, Git is stuck. It doesn't know which version to keep.
Don't panic! This is a routine part of working with Git. The fix involves diving into the affected files, manually choosing which code to keep, and removing the conflict markers Git leaves behind. Once you're done, you commit the newly resolved file. The real secret? Pulling changes from main into your branch often. This keeps you in sync and makes any conflicts that do arise much smaller and easier to manage.
Navigating the Merge vs Rebase Debate
Another hot topic you'll run into is how to update your branch with the latest code from main before you create your PR. This is where the classic "merge versus rebase" debate comes into play. Both commands get the job done, but the way they do it leaves a completely different footprint on your project’s history.
- Merging (
git merge): This approach takes your feature branch and themainbranch and ties them together with a brand-new "merge commit." It’s straightforward and preserves the exact history of how everything happened, but it can make your project log look a bit messy with all those extra commits. - Rebasing (
git rebase): Think of this as rewriting history. It takes the commits from your branch and replays them, one by one, on top of the latest version ofmain. The result is a beautiful, clean, linear history that’s incredibly easy to follow.
Choosing between merge and rebase really comes down to what your team values most. Rebasing gives you a tidy, readable history, which is fantastic for understanding the project's evolution. Merging, on the other hand, provides a more literal and auditable record of every single integration.
To help you decide what's best for your team, here’s a quick comparison of the two approaches.
Git Merge vs Git Rebase in a Pull Request Workflow
This table breaks down the two primary methods for integrating changes, helping teams decide which approach best suits their needs.
| Aspect | Merge Commit | Rebase and Merge | | :--- | :--- | :--- | | Project History | Preserves the exact, non-linear history with a dedicated merge commit. | Creates a clean, linear history by rewriting your branch's commits on top of the target branch. | | Ease of Use | Generally simpler and considered safer, especially for those new to Git. | More complex and can cause problems if you rewrite the history of a shared branch. | | Best For | Teams that prioritise a complete, auditable record of all branching and merging activities. | Teams that value a clean, easy-to-read commit history and want a straightforward project timeline. |
Ultimately, both paths lead to your code getting into main. The key is for your team to pick one and stick with it consistently to avoid confusion.
Handling Failing Checks and Major Feedback
What do you do when your shiny new pull request is suddenly covered in red Xs from automated checks? Or when a reviewer asks for some major changes? First off, take a breath. This is feedback, not failure.
Those failing Continuous Integration (CI) checks are your safety net, designed to catch bugs before they get into the main codebase. Click on the "Details" link next to the failed check, read the logs to figure out what went wrong, and fix the issue locally. When you push the fix up to your branch, the pull request will update and the CI checks will automatically run again.
If a team member requests significant changes, take a moment to understand their perspective. Their feedback is aimed at making the code better and more robust. You don’t need to close the PR or start over; just make the changes and push new commits to the same branch. The pull request will automatically pick up your updates, keeping the entire conversation and all revisions in one tidy place.
Streamlining Workflows with Automation
Let's be honest: manually checking every single line and detail in a pull request is a grind. It’s slow, tedious, and frankly, a recipe for human error. This is exactly where automation steps in to completely reshape the pull request git workflow. Think of it as a tireless assistant that enforces quality standards, freeing up your team to focus on what they do best—solving tricky problems and building great features.
By hooking up your repository to automated tools, you essentially create a quality gate that every proposed change has to pass through. The goal isn't to replace human review, but to supercharge it. By the time a developer actually lays eyes on the code, all the routine, low-level checks are already done and dusted.

Introducing Continuous Integration Pipelines
The engine behind pull request automation is Continuous Integration (CI). In a nutshell, CI is a development practice where everyone on the team merges their code changes into a central repository frequently. Every time they do, a set of automated builds and tests kicks off. Modern platforms like GitHub Actions, GitLab CI/CD, and Jenkins make this incredibly easy to set up.
When a new pull request is opened, it acts as a trigger for a CI pipeline. This pipeline runs through a series of predefined jobs right inside the PR interface, giving you immediate feedback—usually in the form of a satisfying green checkmark or a dreaded red 'X'.
Here are a few of the most common jobs you'll see in a CI pipeline:
- Running Automated Tests: Does this new code break anything that was working before? This is your first line of defence against regressions.
- Code Linting and Formatting: Automatically checks for style inconsistencies, ensuring the entire codebase looks and feels like it was written by one person.
- Security Scanning: Hunts for known vulnerabilities in your code and its third-party dependencies before they ever make it into the main branch.
Leveraging Automation for Deeper Insights
But it doesn't stop with the basics. Automation can give you much deeper insights. You can configure tools to analyse code complexity, flag potential performance bottlenecks, or even manage dependency updates for you by automatically creating a new pull request when a library is out of date. It's also common practice to connect development platforms with project management tools. For teams juggling different systems, learning how to integrate GitHub with Jira can be a massive productivity boost, keeping project statuses and code changes perfectly in sync.
Automation in the pull request process is a force multiplier. It delegates repetitive, low-level tasks to machines, allowing developers to dedicate their limited and valuable cognitive energy to high-level architectural decisions and creative problem-solving.
This isn't just theory; it's standard practice in serious enterprise environments. Take Germany’s tech sector, for example, where GitHub adoption is widespread. Many firms there run their own self-hosted CI/CD runners to comply with strict security policies and boost performance. In fact, a 2025 report highlighted a 35% rise in self-hosted GitHub Actions runners within German enterprises, which directly correlated with faster CI feedback and quicker pull request merges. By automating these essential checks, your team can merge code faster and with far more confidence, transforming the pull request from a simple code review into a powerful, automated quality assurance gateway.
Frequently Asked Questions
Even when you've got the hang of the pull request workflow, some questions just keep coming up. Think of this section as your go-to guide for tackling those common head-scratchers that trip up developers at all levels.
What’s the Difference Between a Pull Request and git pull?
This is easily one of the most common points of confusion, but the two are completely different beasts serving very different purposes.
A git pull is a command you run on your own computer. It's a direct order to grab the latest code from the remote repository and immediately smash it into your current branch. It’s all about you, on your machine, getting your local code in sync with the main project.
A pull request, however, isn't a Git command at all. It's a feature of platforms like GitHub or GitLab. You're essentially tapping your teammates on the shoulder and saying, "Hey, I've got some changes I'd like to add to the main branch. Can you take a look?" It kicks off a conversation, a code review, and a whole collaborative process.
git pullis a direct, local command to update your code. A pull request is a remote, collaborative request to get your code reviewed and merged into the team's codebase.
How Do I Update an Outdated Pull Request?
It happens all the time. You've got a pull request open, but in the meantime, your teammates have been busy merging their own work into the main branch. Now your PR is out of date. No sweat. You just need to pull those new changes from main into your feature branch.
The most straightforward and safest way to get this done is by merging:
- Jump back to your feature branch locally:
git checkout your-feature-branch - Grab the latest updates from the remote repository:
git fetch origin - Merge the latest version of
maininto your branch:git merge origin/main - Finally, push your newly updated branch:
git push
This creates a new merge commit on your branch, and your pull request on the platform will automatically refresh to show the updated code.
Can You Close a Pull Request Without Merging?
Absolutely. Not every idea makes it to the finish line. Maybe the feature got scrapped, or you found a much better way to solve the problem. Closing a pull request is the standard way to officially say, "These changes aren't going in."
On platforms like GitHub, you’ll see a big "Close pull request" button at the bottom of the page. It’s always a good idea to leave a comment explaining why it's being closed to keep everyone in the loop. And don't worry—closing a PR does not delete your branch. The code is still safe and sound, and you can even reopen the request later if things change.
At Acquispect, we believe your work should speak for itself. We're building the foundation for a true meritocracy where verified skills, not just résumés, connect elite talent with the right opportunities. Explore how we're creating the trust layer for the modern economy at https://acquispect.com.