Let's be honest, connecting GitHub and Jira is about creating a single, undisputed source of truth for your entire development process. It’s the bridge between your code repositories and your project management board. When done right, it allows your developers to update Jira issues without ever leaving their command line. This is the secret to unlocking a workflow that's not just more efficient, but also transparent and surprisingly automated.
Why You Should Integrate GitHub with Jira
In a typical, disconnected setup, developers live in GitHub while project managers track everything in Jira. This constant separation is a major source of friction. Developers are forced to switch contexts, hopping out of their IDE just to drag a ticket to the next column, log their time, or add a quick comment.
Meanwhile, project managers are left chasing people for updates, which often leads to inaccurate forecasting and delayed feedback. The whole process devolves into a tedious cycle of manual, repetitive tasks that kills productivity and opens the door to human error.
Integrating the two platforms completely changes the game. Picture this: a developer pushes a commit with a message like git commit -m "DEV-123 #in-progress #comment Fixed the login bug". Instantly, the Jira ticket DEV-123 moves to "In Progress," and that comment appears right on the ticket. No context switching, no manual updates. It just works.
Unlocking True Development Velocity
The benefits go far beyond just saving a few clicks. This connection fosters a culture of transparency and accountability where every single piece of code is directly tied to a business objective tracked in Jira. This creates an incredibly powerful feedback loop that genuinely speeds up development cycles and improves the final product.
Here’s what you really gain:
- Complete Traceability: Every pull request, commit, and branch gets linked to a Jira issue. This gives you a perfect, auditable trail from the moment a task is created to the second the code is deployed.
- Enhanced Collaboration: Stakeholders, testers, and managers can see real-time development progress directly inside Jira tickets. No more asking "what's the status?" or trying to navigate GitHub.
- Accurate Project Forecasting: When statuses are updated automatically, your project timelines and sprint burndown charts become far more reliable. This makes planning infinitely easier.
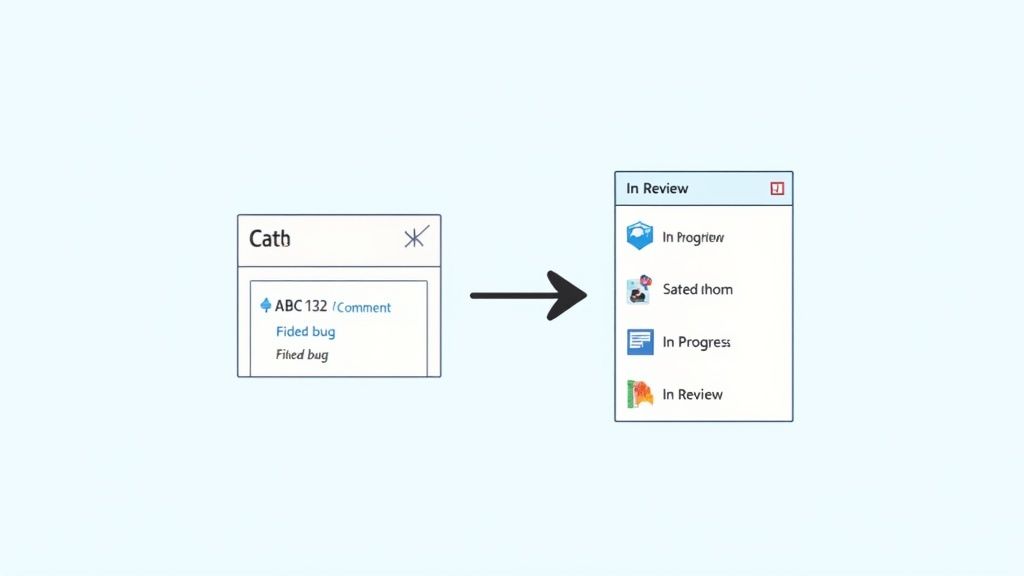
- Streamlined Code Reviews: When a pull request is opened, the relevant Jira ticket can be set to automatically move to an "In Review" status, pinging the right people immediately.
By linking your code directly to project tasks, you're not just connecting tools; you're aligning your engineering efforts with strategic business goals. This is a fundamental step in building a modern, high-performing DevOps environment.
At the end of the day, integrating GitHub with Jira helps you build a smarter, more responsive development ecosystem. It frees up your team to focus on what they do best—writing great code—instead of getting bogged down in administrative busywork. This sets the stage for faster releases and higher-quality products.
Right, let's get into the nitty-gritty of connecting GitHub and Jira. Before you even touch a setting, you've got a crucial decision to make. Are you going to stick with the official GitHub for Jira app, or is it worth exploring the more powerful third-party tools available on the Atlassian Marketplace?
There's no single right answer here—it all comes down to what your team actually needs.
The official app is your most direct route. It's built and maintained by GitHub, it's free, and it covers the basics perfectly. If all you need is to see which commits, branches, and pull requests are tied to a Jira issue, this will get you up and running in no time. It's a fantastic starting point for bringing development work into view for the rest of the team.
But let's be honest, many teams hit the limits of the official app pretty quickly. Its biggest drawback is that it’s mostly a one-way street, pushing information from GitHub into Jira. For teams that need more sophisticated workflows, where an update in Jira might need to trigger something back in GitHub, this can feel restrictive.
When to Look Beyond the Official App
This is exactly where third-party connectors shine. Tools from specialists like Getint or GitKraken are built for people who need more than just basic visibility. They’re designed for complex, enterprise-level setups and often provide the kind of deep, two-way synchronisation that the official app lacks.
You should seriously consider a third-party tool if you find yourself nodding along to these questions:
- Do you need advanced automation? Think about building rules that go beyond just linking code, like automatically changing a PR status when a Jira ticket moves to "In Review".
- Are you working at scale? If you're managing dozens of repositories across multiple GitHub organisations with hundreds or thousands of users, you need a tool built for that kind of load.
- Is customisation a must-have? Do you need to control precisely what data gets synced and how it’s displayed in both platforms?
This choice isn't just about what you need today. It's about where your team is headed. A simple connection might be fine for now, but a more robust connector gives you the runway to grow and refine your processes without having to start over later.
A Quick Comparison of Your Options
To help you weigh your options, here’s a side-by-side look at what you can generally expect from the official app versus a more feature-rich third-party connector.
Comparison of GitHub-Jira Integration Methods
| Feature | Official GitHub for Jira App | Third-Party Connectors (e.g., Getint, GitKraken) | | :--- | :--- | :--- | | Cost | Free | Paid (Subscription-based) | | Sync Direction | Primarily one-way (GitHub to Jira) | Bi-directional (Jira <> GitHub) | | Setup Complexity | Simple and quick | More involved, but highly customisable | | Automation | Basic (e.g., smart commits) | Advanced, custom rule-based automation | | Scalability | Best for small to medium teams | Designed for large-scale, enterprise use | | Data Residency | Limited or standard options | Often includes specific regional options (e.g., EU, US) | | Support | Standard community/GitHub support | Dedicated, expert support |
Ultimately, the table shows a clear trade-off: the official app gives you speed and simplicity at no cost, while third-party tools offer power, flexibility, and enterprise-grade features for a price.
Don't Forget Data Residency and Compliance
For many organisations, especially those in Europe or other regions with strict data laws, this next point is a deal-breaker. Where your data lives matters. Regulations like GDPR mean you have to be certain where your information is being processed and stored.
This is an area where specialised third-party connectors often have a massive lead. For example, Git Integration for Jira Cloud now offers dedicated data residency in the AWS Frankfurt region. For any new EU customers, this guarantees that all their integration processing stays within the European Union. It's a non-negotiable for GDPR compliance and, as a bonus, they found it cut setup times by up to 40%.
So, what's the verdict? If you're just starting out and need simple visibility, the official app is a great, no-risk choice. But if your team demands deep automation, needs to operate at an enterprise scale, or has strict compliance requirements, investing in a powerful third-party connector is the only way to go.
Getting GitHub and Jira Connected
Alright, let's get our hands dirty. Whether you're going with the official app or a beefier third-party connector, your journey starts in the same place: the Atlassian Marketplace. The whole point here is to forge a secure, authenticated link between where your code lives and where your project planning happens.
First things first, you'll need to head over to the Atlassian Marketplace, which you can usually find right inside your Jira instance under "Apps" or "Settings". Just use the search bar to find the app you've decided on – a quick search for "GitHub for Jira" or the name of a specific connector like Getint's should do the trick.
This flowchart maps out the main decision points you'll face when picking an integration method from the marketplace.
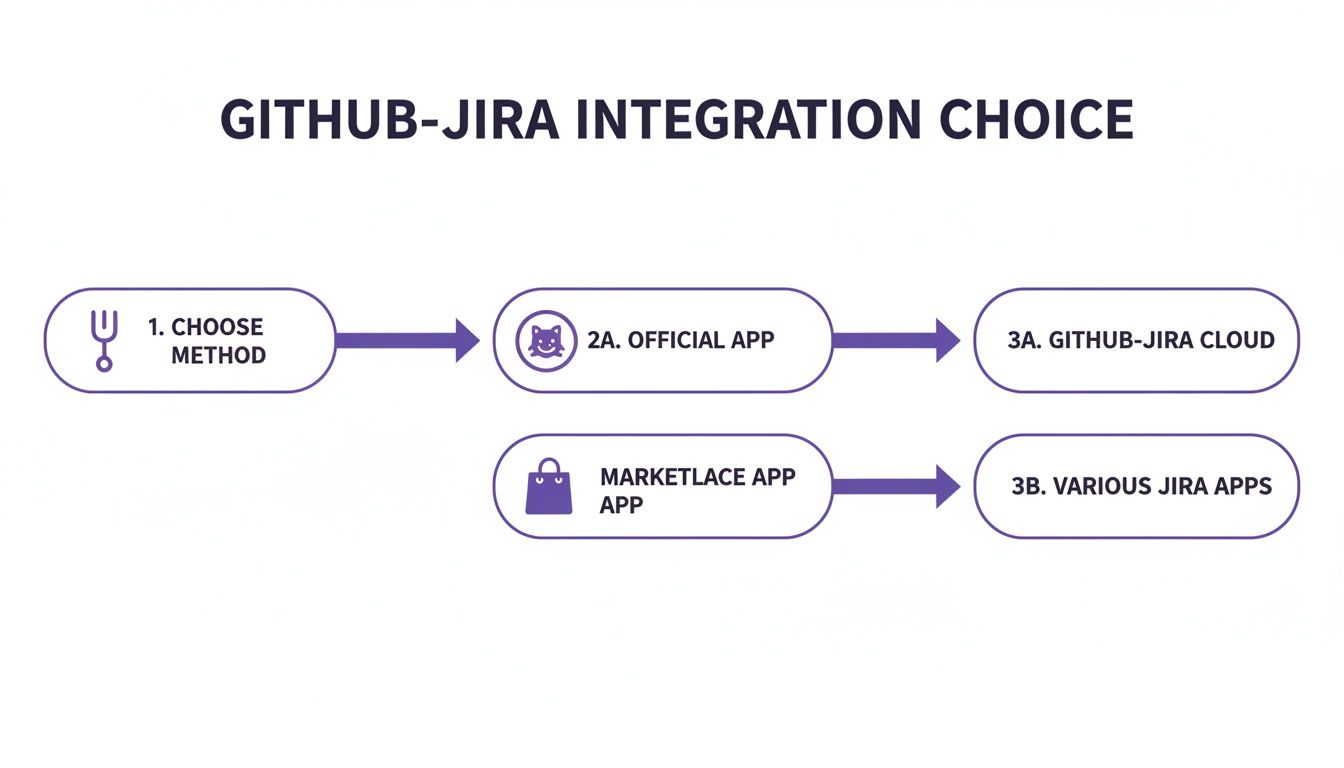
As you can see, the path splits depending on whether you just need the straightforward features of the official app or the more advanced capabilities of a marketplace alternative.
Installing and Configuring Your App
Once you've found your app, installing it is usually just a one-click affair. But the real work begins right after. The app will immediately prompt you to connect it to your GitHub account or, more commonly, a specific GitHub organisation.
This is the authorisation step. You'll get bounced over to GitHub to grant the app the permissions it needs to see your repository data. It’s really important to pause and read what you’re authorising here. Make sure the app is only asking for the access it genuinely needs to do its job.
A quick word of advice: Always try to connect the app at the GitHub organisation level if you can. It makes managing everything so much simpler down the line. Permissions are consistent across all your repositories, and bringing new projects on board is a breeze compared to authorising repos one by one.
After you've given it the green light, you'll be sent back to Jira to wrap things up. This is where you tell the app which specific repositories should be linked to your Jira projects. With that done, the app will kick off its initial sync, often called a "backfill".
Think of this as a one-time deep dive. The app scans your chosen repositories for all the historical data—commits, branches, pull requests—and intelligently links them to the right Jira issues by looking for issue keys (like PROJ-123) in the commit messages. This backfill is what magically populates your Jira tickets with all that rich, historical development context, so none of your team's past work gets lost in translation. Depending on how big and old your repos are, this can take anywhere from a few minutes to a few hours.
Making Sense of the Marketplace Ecosystem
The Atlassian Marketplace is a treasure trove, and it really highlights how different every development team's needs can be. The official GitHub app is a fantastic starting point for many, but you'll find specialised tools are gaining a lot of ground, especially in regions with unique technical requirements.
Take Getint's Jira-GitHub Connector, for example. In the DE region, its installations shot up by an incredible 19% in a single month. This isn't a random spike; it's tied directly to the huge push for DevOps tools within Germany's Industry 4.0 initiatives and a 35% year-over-year jump in Atlassian suite adoption among DAX 40 companies. If you're curious about why this kind of robust, two-way sync is becoming non-negotiable for so many, you can explore more insights on this integration growth.
Putting Your Workflow on Autopilot with Smart Commits
Now that you’ve connected GitHub and Jira, it’s time to make the integration do the heavy lifting for you. This is where you graduate from simply seeing dev activity in Jira to actively automating your entire workflow. The secret sauce? A feature called Smart Commits.
Think of Smart Commits as a way for your developers to pilot Jira directly from their Git command line. Instead of pushing code and then hopping over to Jira to manually drag a ticket across the board, they can embed simple commands right into their commit messages. It's a small tweak to their routine that has a massive pay-off, killing context switching and ensuring your project board is always an accurate, real-time reflection of progress. No more administrative busywork.
Getting the Hang of Smart Commit Syntax
The syntax itself is refreshingly simple and flexible. The basic structure is JIRA-ISSUE-KEY #command <additional_info>.
Here are the core actions you'll use most often:
- Dropping a Comment: Just use
#commentfollowed by your note. This is perfect for leaving technical details or updates on the ticket.git commit -m "DEV-442 #comment Added front-end validation for the new user registration form."
- Changing an Issue's Status: You can push a ticket to any valid status in your workflow, like "In Progress" or "Ready for QA".
git commit -m "DEV-442 #in-progress #comment Kicking off work on the API endpoint."
- Logging Work Hours: Track your time spent directly from the commit with
#time.git commit -m "DEV-442 #time 2w 1d 4h 30m #comment Finished the database schema refactor."
The real magic happens when you chain these commands together. Imagine a developer is pushing the final piece of code for a bug fix.
git commit -m "BUG-101 #done #time 1h #comment Final fix deployed. All unit tests are green."
With that single commit message, the developer has transitioned the BUG-101 ticket to "Done," logged the last hour of work, and left a closing comment. That's the kind of efficiency that makes this integration a genuine game-changer.
Taking It Further with Jira Automation Rules
Smart Commits are fantastic, but they're only half the story. The true power is unlocked when you start using events from GitHub to trigger automation rules inside Jira. This lets you build a workflow that automatically reacts to what your developers are doing, creating a project board that essentially manages itself.
For instance, you can set up a Jira Automation rule that's always listening for a "Pull Request created" event. When a developer opens a PR that references a Jira issue, the rule can fire instantly to:
- Transition the issue automatically from "In Progress" to "In Review."
- Assign the ticket to your team’s QA lead or a senior developer.
- Add a comment to the Jira ticket with a direct link back to the PR for a one-click review.
This completely eliminates the manual handoff. The moment the code is ready for review, the process kicks off without anyone needing to do a thing. It’s this kind of seamless flow that lets your team stay focused on writing great code, which is precisely why you want to integrate GitHub with Jira in the first place.
Managing Security and Permissions
Let's be blunt: when you connect GitHub and Jira, you're building a bridge between two of the most vital systems in your organisation—your source code and your project management hub. This is more than just a simple plugin; it’s a direct line into your intellectual property. Rushing into this integration without a solid security plan is a mistake I’ve seen teams make, and it’s a risk you simply can’t afford to take.
The guiding star here should always be the principle of least privilege. It’s a simple concept: the integration should only have the absolute bare-minimum access it needs to do its job, and nothing more. This means being deliberate about which repositories the GitHub App can access and what it's allowed to do there. Handing it the keys to every single repository—including those holding sensitive infrastructure code or credentials—is an open invitation for trouble.
Fine-Tuning Repository Access
Your first major security decision happens right at the setup screen. When Jira asks for permission, GitHub gives you a choice. You can grant access to "All repositories" or "Only select repositories." Always, always choose the second option.
This forces you to be intentional. For example, your front-end team probably only needs the integration to see their UI repositories. Your back-end team needs it for their API services. There’s absolutely no reason for the integration to have a peek into repositories it will never touch.
Here’s how to think about it in practice:
- Public vs. Private Repositories: Just because a repository is public doesn't mean its associated Jira data should be. Jira issues can contain sensitive internal chatter and planning details. Make sure your setup doesn’t accidentally create a backdoor to that information.
- Team-Based Access: In larger companies, this is non-negotiable. Structure access around your GitHub teams. Give the integration permissions only for the repositories that belong to specific development teams.
This isn't just about locking things down. It also keeps your integration clean. You avoid cluttering Jira projects with commits and pull requests from irrelevant repos, which is a nice side benefit. It’s a small step that dramatically shrinks your potential attack surface.
A classic mistake I see is treating the integration as a "set it and forget it" tool. Security isn't a one-time task. You need to revisit this. Schedule a review every quarter or at least twice a year to check the app’s permissions. Do they still make sense with your current team structure and projects?
Organisation-Level Settings and Audits
To keep things consistent and under control, the integration should always be managed at the GitHub organisation level. Don't let individual users create their own one-off connections. Centralising the administration means you can enforce a single, sane security policy across every team and project.
From your organisation's settings, you can define default permissions and keep an eye on what the integration is actually doing. Get familiar with the audit logs. Scan them for anything that looks out of place, like the app suddenly accessing a repository it has no business being in. Proactive monitoring is what turns a useful integration into a secure and trustworthy one, ensuring your slick new workflow doesn’t come at the expense of your code's integrity.
Troubleshooting Common Integration Problems
Even a perfectly set-up integration can hit a snag now and then. When you integrate GitHub with Jira, small hiccups can easily throw your team's entire rhythm off track. The good news is that most common issues have fairly simple fixes, turning potential roadblocks into minor bumps in the road.
One of the most frequent complaints I hear is Smart Commits failing to register. A developer pushes a commit, the Jira issue key is right there in the message, but… nothing. The ticket just sits in its old status column, and no related activity shows up.
Another classic headache is the missing development panel. You click into a Jira issue expecting to see a neat summary of all the associated commits, branches, and pull requests, but the panel is either completely blank or showing old, irrelevant data. This completely undermines the single source of truth you were trying to create.
Diagnosing Sync and Webhook Failures
When things start to go sideways, your first port of call should always be the webhook configuration over in GitHub. Think of webhooks as the messengers carrying news from GitHub to Jira; if they go quiet, Jira is left in the dark.
Head over to your repository’s settings in GitHub and find the "Webhooks" section. You should see a URL pointing to your Jira instance. Click on it and check out the "Recent Deliveries" tab. A long list of red, failed deliveries is your smoking gun. The usual suspects behind this are:
- Incorrect Payloads: The webhook might not be configured to send the specific event data your Jira integration is listening for.
- Firewall or Network Issues: If your Jira instance is self-hosted, it’s very possible that network security rules are blocking the incoming pings from GitHub.
- App Permissions: It’s worth double-checking that the GitHub App still has the permissions it needs. Sometimes, organisation-wide security updates can quietly revoke access, breaking the connection.
Don't underestimate the impact of external updates. A stable integration isn't guaranteed to stay that way forever, as system-wide changes can cause unexpected disruptions.
For example, after major updates back in April and May, a huge number of DE-region Jira Cloud instances found their GitHub integrations suddenly broken. The community forums were flooded with people reporting that Smart Commits and webhooks had just stopped working. By June, 85% of affected DE users were back up and running, thanks to patches that included much better troubleshooting tools. It was a stark reminder of why having a recovery plan is so important. You can read more about how the community worked through these Jira and GitHub integration updates.
A Practical Checklist for Resyncing Data
If your webhooks look healthy but the data in Jira is still missing or out of date, you might need to trigger a manual resync.
Before you do, it's always worth a quick sanity check: is the Jira issue key (PROJ-123) formatted correctly in your commit messages? And does that issue actually exist? Simple mistakes happen.
If that's all correct, your next move is to go into the GitHub App settings within your Jira project. Look for an option labelled something like "resync" or "backfill" for a specific repository. Kicking this off forces the app to re-scan that repo's entire history and rebuild all the links to your Jira issues. It’s often the quickest way to fix any lingering data mismatches.
At Acquispect, we believe work is the only proof of work. We're building the trust layer for a meritocratic world where your skills, not your resume, define your opportunities. See how we're ending the era of claims at https://acquispect.com.